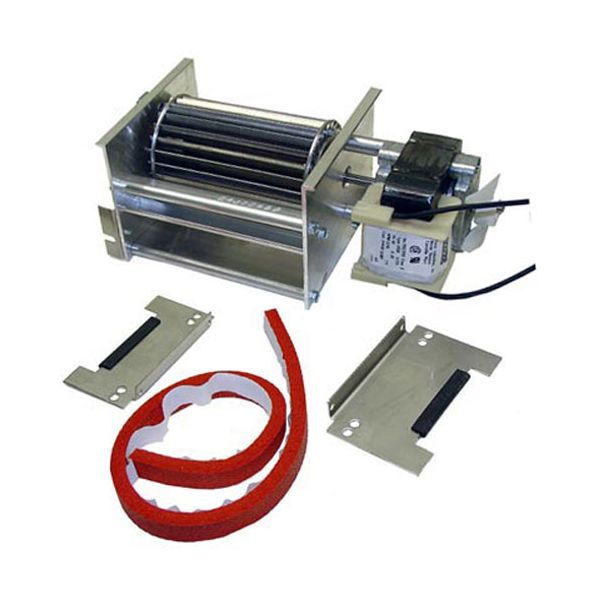
Hatco 02.12.003B Blower Motor Assembly 120V

Special Price $325.98 Regular Price $700.00
In stock
SKU
02.12.003B
The Hatco 02.12.003B Blower Motor Assembly 120V circulates air in the heating or holding unit by rotating the attached blower wheel when turned on. The motor turns to generate airflow which moves the heat evenly throughout the interior. This assembly fits into the blower housing of the equipment, and is usually installed using the hardware provided to ensure that it fits correctly. The design is to fit certain units and the entire kit is to be replaced when the motor or blower unit becomes ineffective or loses efficiency.

Dimensions

  • Length: 10 In
  • Width: 6.3 In
  • Height: 6.5 In
  • Weight: 4.4 lbs
https://partsfe.com/media/catalog/product/h/a/hatco-02-12-003b-8-3-4-motor-blower-assembly-with-hardware-37683-2.jpg

Product Notes

  • Motor / Blower Assembly W/ Hardware For Units Made
  • Before June 1998. Hardware Is Conversion Kit To Mount
  • This Motor Assembly.
  • Dimensions: Overall Width (Incl Motor)- 8-3/4".
  • Blower Assy Only - 5-1/4" X 4-1/4" X 3-3/8"
  • Blower Wheel - 4" X 2-3/8"
  • Same As # 68-1132 But Added Hardware For Conversion
  • Of Old Style Units. Used On Units B4 6/98 - Std Wattage
  • Cabinets Rated 1725W.
  • Units Made From June 1998 To Present Use Motor Assenbly
  • # 68-1132.
  • Hatco
  • Warmer Series: Fs, Fshc, Fst, Wfst.
Write Your Own Review
You're reviewing:Hatco 02.12.003B Blower Motor Assembly 120V
Your Rating
Customer Questions
What maintenance is required for the Hatco 02.12.003B Motor/Blower Assembly?

Clean blower components to remove grease and dust buildup. Inspect motor and fan blades for wear. Ensure secure mounting and proper airflow. Maintenance ensures efficient cooling, prevents overheating, and maintains consistent equipment performance.

What are common issues with the Hatco 02.12.003B Motor/Blower Assembly?

  • Reduced airflow due to debris or buildup in blower assembly.
  • Motor failure or intermittent operation during equipment use.
  • Noise caused by worn bearings or loose components.
  • Overheating due to restricted ventilation or heavy load.
  • Imbalance or vibration affecting overall performance.

We strive to provide our customers with a hassle-free and efficient shopping experience. Our shipping policy ensures the timely delivery of your orders and complete customer satisfaction. View More

We are committed to ensuring your complete satisfaction with every purchase. We understand that circumstances may arise where you must return a product or request a refund. If for any reason you are not satisfied, you may return the item(s) according to the terms outlined below. View More

This Payment Policy outlines the terms and conditions governing all payments made for products purchased through our website. By making a purchase, you agree to be bound by this Payment Policy. View More

Installation Steps

Step1: Turn off and unplug the appliance.

Step2: Remove panels or covers to access the old assembly.

Step3: Detach the existing motor/blower, noting connections and mounting points.

Step4: Clean the area of dust or debris.

Step5: Position the new motor/blower assembly in place.

Step6: Secure all screws and brackets tightly.

Step7: Reconnect all wiring exactly as before.

Step8: Restore power and test blower operation.