
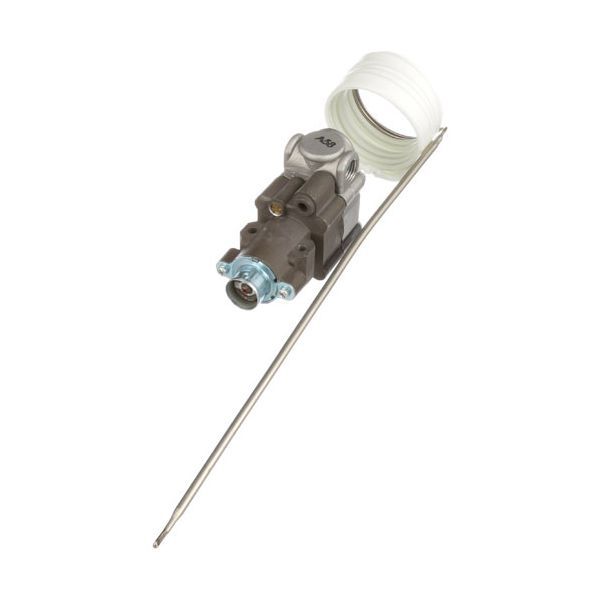
American Range 10421 Thermostat BJWA

Special Price $209.74 Regular Price $395.00
In stock
SKU
10421
Manufacturer:

The American Range 10421 Thermostat BJWA is a part that controls the internal temperatures by checking the amount of heat and changing the level of gas flow to the burner according to the settings of the dial. This mechanical component uses a capillary tube and sensing bulb filled with fluid, which expands or contracts to activate the internal valve mechanism. This fits directly on the pipe of the skillet, which is directly on the manifold behind the front control panel where the adjustment knob is attached to the heating stem.

Dimensions

  • Length: 11.25 In
  • Width: 4.5 In
  • Height: 4.5 In
  • Weight: 1 lbs
https://partsfe.com/media/catalog/product/a/m/american-range-10421-griddle-oven-bjwa-thermostat-95008-2.jpg

Product Notes

  • Thermostat-Bjwa, Griddle/Oven, Low-450°F, Rotation - 180°,
  • Outlet Position "B", Outlet Size 1/4" 48" Cap Tube With
  • Fiberglass Sleving. 3/16 X 11" Bulb. W/By-Pass Adjustment.
  • For Knob Use Ap# 22-1393.
  • Fits American Range Models~
  • Ar, Ar-30, Ar-C, Ar-Nv, Ar4C, Arb, Ards, Arg, Arlb, Arlm-1,
  • Arlm-2, Arrg, Arw-36
AMERICAN RANGE:
Write Your Own Review
You're reviewing:American Range 10421 Thermostat BJWA
Your Rating
Customer Questions
What maintenance is required for the American Range 10421 Thermostat?

Regularly inspect the thermostat for accurate temperature regulation and ensure the sensing probe is clean and properly positioned. Check wiring connections for looseness or corrosion. Calibrate periodically to maintain accurate heat control. Avoid moisture exposure and ensure the control area remains free of grease buildup to prevent performance inconsistencies and unsafe temperature fluctuations.

What are common issues with the American Range 10421 Thermostat?

  • Inaccurate temperature readings or drift.
  • Thermostat failing to connect heating cycle.
  • Intermittent heating or temperature fluctuations.
  • Wiring faults causing loss of control signal.
  • Sensor misalignment leading to incorrect sensing.

We strive to provide our customers with a hassle-free and efficient shopping experience. Our shipping policy ensures the timely delivery of your orders and complete customer satisfaction. View More

We are committed to ensuring your complete satisfaction with every purchase. We understand that circumstances may arise where you must return a product or request a refund. If for any reason you are not satisfied, you may return the item(s) according to the terms outlined below. View More

This Payment Policy outlines the terms and conditions governing all payments made for products purchased through our website. By making a purchase, you agree to be bound by this Payment Policy. View More

Installation Steps

Step1: Disconnect power and gas supply for safety before servicing.

Step2: Remove control panel cover carefully using screwdriver.

Step3: Label and disconnect old thermostat wiring using photos.

Step4: Unscrew and remove faulty thermostat.

Step5: Mount new thermostat in same position.

Step6: Reconnect wiring securely per diagram, ensure tight terminals.

Step7: Restore power and test temperature control and verify operation.