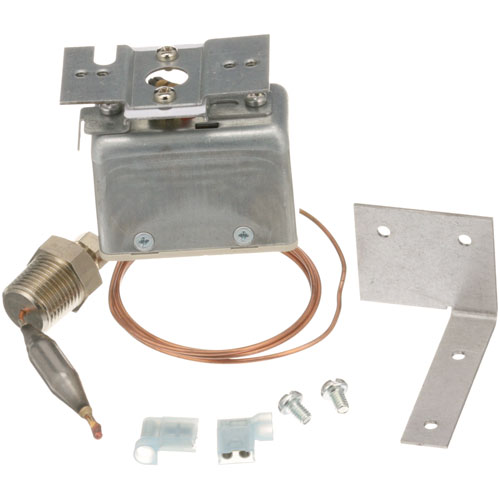

Southbend 2927-1 Safety Thermostat 3/8" X 2"
Specifications:
- Product Change - Vulcan Hart Changed To Jumo . Comes With
- Bracket. 257F, No Dial Required. Slot For
- Screwdriver Adj.
- Was [ Type - Emf ] [ Temp 250 ] [ Bulb 3/8 X 2 ] [
- Cap 48" ] [ Size 3/8 Stuff ]]
- Market Forge
- Southbend R18A-4
- Vulcan
Description
Dimensions:
- Weight: 0.47 lbs
- Length: 8 in
- Height: 3.25 in
- Width: 5.5 in
This Part Fits the Following Models
49 modelsBLODGETT:
CROWN STEAM:
Step1: Disconnect power supply and confirm oven is completely cool; apply lockout/tagout procedures for safety.
Step2: Remove control or access panel to reach the thermostat assembly location.
Step3: Label and disconnect all wiring from the existing old thermostat carefully.
Step4: Unscrew and remove the faulty thermostat from mounting point.
Step5: Install new thermostat ensuring probe is correctly positioned in sleeve and secure firmly.
Step6: Reconnect wiring, reassemble panel, restore power, and test safety cutoff operation.
-
What maintenance is required for the Southbend 2927-1 Safety Thermostat?
Regularly inspect the thermostat for signs of wear, corrosion, or loose connections to ensure accurate operation. Keep surrounding components clean and free of grease buildup. Verify proper calibration periodically to maintain accurate temperature control. Always disconnect power before servicing to prevent electrical hazards.
-
What are common issues with the Southbend 2927-1 Safety Thermostat?
- Inaccurate temperature readings or failure to regulate heat properly.
- Thermostat not triggering shutoff at designated limits.
- Electrical connection faults or intermittent operation.
- Sensor probe damage causing inconsistent performance.
Customer Reviews
No reviews yet. Be the first to write one!
Write a Review
We strive to provide our customers with a hassle-free and efficient shopping experience. Our shipping policy ensures the timely delivery of your orders and complete customer satisfaction. View More
We are committed to ensuring your complete satisfaction with every purchase. We understand that circumstances may arise where you must return a product or request a refund. If for any reason you are not satisfied, you may return the item(s) according to the terms outlined below. View More
This Payment Policy outlines the terms and conditions governing all payments made for products purchased through our website. By making a purchase, you agree to be bound by this Payment Policy. View More