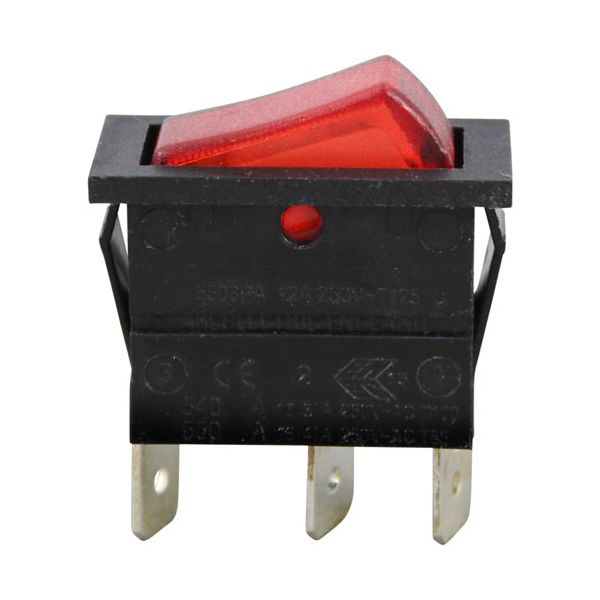
APW 2E-1305610 Warmer Lighted Rocker Switch SPDT On/Off

Special Price $22.90 Regular Price $46.74
Out of stock
SKU
2E-1305610
Manufacturer:
The APW 2E-1305610 Warmer Lighted Rocker Switch SPDT On/Off completes or interrupts electrical current when the rocker is pressed to enable current flow in the ON position and disallow it in the OFF position. The switch has an internal light that is lit when the switch is on to show that the circuit is activated. This is a lighted rocker switch that is intended to be used in applications that are intended to operate at 250 VAC and have a typical panel-mount installation in commercial foodservice and appliance systems.

Dimensions

  • Length: 1.5 In
  • Width: 1.25 In
  • Height: 0.5 In
  • Weight: 0.25 lbs
https://partsfe.com/media/catalog/product/a/p/apw-2e-1305610-lighted-red-rocker-switch-on-off-250vac-78337-2.jpg

Product Notes

  • Lighted Rocker Switch, On/Off, Black Body With Red Light,
  • 16A 250V Ac, 3 Pole 1/4" Tabs, Sp/St, 3/8 X 1-1/8" Hole
  • Fits Apw/ Wyott Models:
  • Bwd-31, Bwd-50, Bwd-75,Bwd-75N, Ctcw, Ctcw-L, Ctcw43, Cw-1,
  • Cw-13 120V, Cw-13 220V, Cw-2, Cw-2A, Cw-3, Cw-4, Cw-5,
  • Fry28, Hdc-4, Pd-4, Ptd-4, Rtr-4, Sptu-30, Sptu-30N,
  • Sptu-50, Sptu-50N, Yds5
APW WYOTT:
1305610, 2E-1305610, APW1305610
Write Your Own Review
You're reviewing:APW 2E-1305610 Warmer Lighted Rocker Switch SPDT On/Off
Your Rating
Customer Questions
What maintenance is required for the APW 2E-1305610 Rocker Switch?

Check the switch regularly for proper operation and inspect wiring for corrosion or looseness. Clean dust or debris from the surface to ensure efficient and accurate switching. Confirm the switch is securely mounted for consistent control.

What are common issues with the APW 2E-1305610 Rocker Switch?

  • Switch failing to turn on or off properly.
  • Intermittent electrical contact causing inconsistent operation.
  • Illumination not performing on lighted models.
  • Loose or corroded terminals affecting performance.
  • Physical wear or cracking of the switch body.
  • Difficulty toggling the switch smoothly, reducing operational accuracy.

We strive to provide our customers with a hassle-free and efficient shopping experience. Our shipping policy ensures the timely delivery of your orders and complete customer satisfaction. View More

We are committed to ensuring your complete satisfaction with every purchase. We understand that circumstances may arise where you must return a product or request a refund. If for any reason you are not satisfied, you may return the item(s) according to the terms outlined below. View More

This Payment Policy outlines the terms and conditions governing all payments made for products purchased through our website. By making a purchase, you agree to be bound by this Payment Policy. View More

Installation Steps

Step1: Turn off and unplug the appliance.

Step2: Remove the old switch from the panel.

Step3: Connect the wires to the new switch following the same configuration.

Step4: Insert the switch into the panel until it clicks securely.

Step5: Plug in the appliance and verify the light and switching operations.