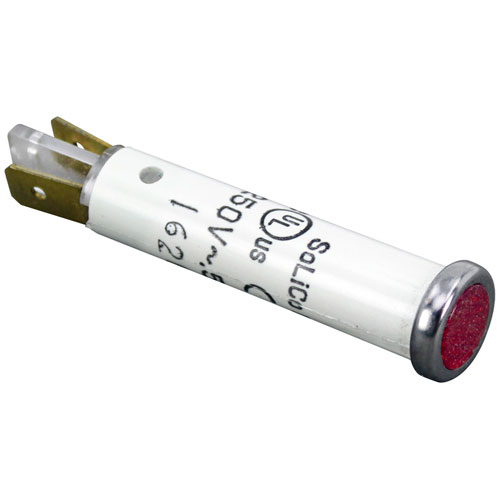
Hobart 342575-00001 Red Indicator Light 5/16" 250V
Specifications:
- Signal Light,
- 250 V [ Fits Hole 5/16" ] [3/16" Tabs ] [Color Red]
- [ Type Hat Flat ][ Bezel Chrome]
- [ Needs Fastener Clip # 26-2263 ]
- Hobart
Description
Dimensions:
- Weight: 0.1 lbs
- Length: 0.2 in
- Height: 2 in
- Width: 0.2 in
GENERAL ELECTRIC:
HOBART:
00-342575-00001 00-342575-1 00-825100 342575-1 824324-1 825100 HOB00-342575-1 HOB342575-1 XNC25X89/342575-1
VULCAN HART:
00-342575-00001 00-825100 342575-1 824324-1 825100 VH342575-1 VH825100
Step1: Turn off electrical power at the unit and verify no voltage is present.
Step2: Remove access panel and disconnect wiring from the existing indicator light.
Step3: Release retaining tabs and extract the old light assembly from the mounting hole.
Step4: Insert the new indicator light with bezel aligned to the panel opening.
Step5: Secure using tabs until firmly seated.
Step6: Reconnect wires to matching terminals.
Step7: Restore power and confirm proper illumination and stable operation.
-
What maintenance is required for the Hobart 342575-00001 Chrome Bezel Red Indicator Light?
Inspect the indicator light periodically for secure mounting and clean lens condition. Ensure electrical tabs remain tight and free from corrosion or heat damage. Replace the light if flickering, dimming, or failure occurs. Proper upkeep ensures accurate visual status indication and better operation.
-
What are common issues with the Hobart 342575-00001 Chrome Bezel Red Indicator Light?
- Flickering or intermittent light output.
- Burned-out bulb or LED failure.
- Loose or corroded tab connections.
- Cracked or discolored chrome bezel.
- Poor electrical contact causing weak illumination.
- Moisture ingress affecting performance.
Customer Reviews
No reviews yet. Be the first to write one!
Write a Review
We strive to provide our customers with a hassle-free and efficient shopping experience. Our shipping policy ensures the timely delivery of your orders and complete customer satisfaction. View More
We are committed to ensuring your complete satisfaction with every purchase. We understand that circumstances may arise where you must return a product or request a refund. If for any reason you are not satisfied, you may return the item(s) according to the terms outlined below. View More
This Payment Policy outlines the terms and conditions governing all payments made for products purchased through our website. By making a purchase, you agree to be bound by this Payment Policy. View More