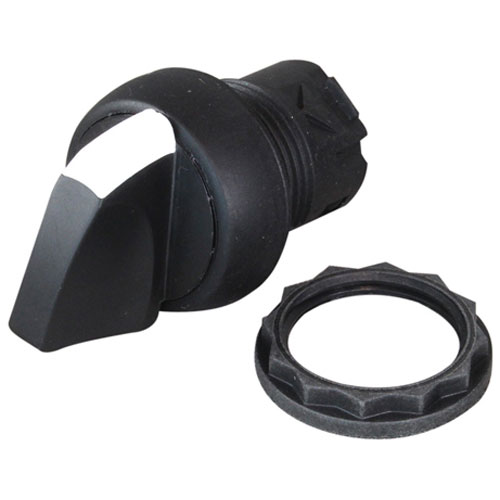
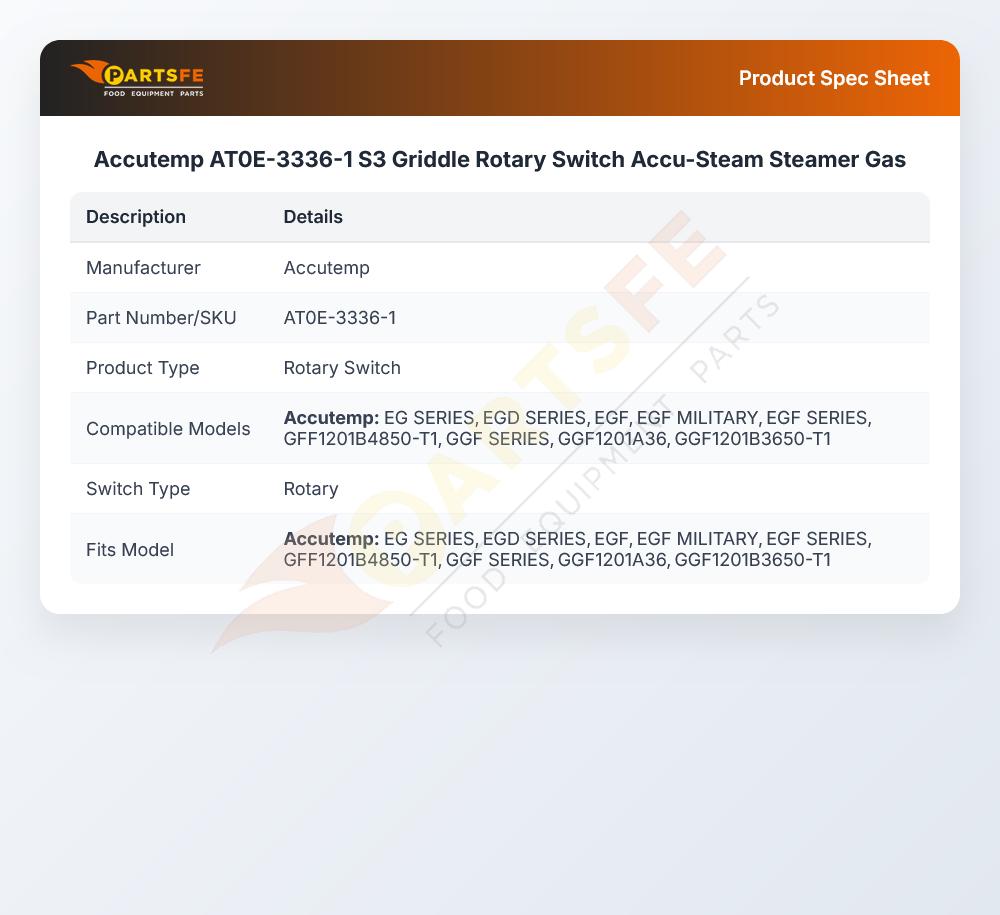
Accutemp AT0E-3336-1 S3 Griddle Rotary Switch Accu-Steam Steamer Gas
Specifications:
- Rotary Switch
- Accutemp Steamer Accu-Steam Gas, S3
- Griddle Ggf1201A36,
Description
Dimensions:
- Weight: 0.05 lbs
- Length: 2 in
- Height: 2 in
- Width: 1 in
This Part Fits the Following Models
9 modelsACCUTEMP:
ACCAT0E-3336-1 ACCAT0E3336-1 AT0E3336-1 ATOE-3336-1 ATOE3336-1
Step1: Turn off gas and electrical supply, apply lockout tagout, and let unit cool completely, ensure safety.
Step2: Remove control panel and disconnect old rotary switch noting wire positions.
Step3: Install switch into mounting slot and secure firmly.
Step4: Reconnect wiring per original layout ensuring tight insulated connections.
Step5: Restore power/gas test all settings for smooth operation and proper ignition control before use check operation.
-
What maintenance is required for the Accutemp AT0E-3336-1 Rotary Switch?
Inspect the griddle rotary switch periodically for smooth turning and proper engagement at each setting. Clean around the knob area to prevent grease or debris buildup that may affect operation. Ensure all electrical connections remain tight and free from corrosion. Replace the switch if any signs of overheating, stiffness, or inconsistent control are detected.
-
What are common issues with the Accutemp AT0E-3336-1 Rotary Switch?
- Difficulty turning due to internal damage or grease buildup.
- Intermittent heating or control failure from worn contacts.
- Loose or damaged wiring connections.
- Selector positions not aligning correctly.
- Complete switch failure causing loss of temperature control.
Customer Reviews
No reviews yet. Be the first to write one!
Write a Review
We strive to provide our customers with a hassle-free and efficient shopping experience. Our shipping policy ensures the timely delivery of your orders and complete customer satisfaction. View More
We are committed to ensuring your complete satisfaction with every purchase. We understand that circumstances may arise where you must return a product or request a refund. If for any reason you are not satisfied, you may return the item(s) according to the terms outlined below. View More
This Payment Policy outlines the terms and conditions governing all payments made for products purchased through our website. By making a purchase, you agree to be bound by this Payment Policy. View More