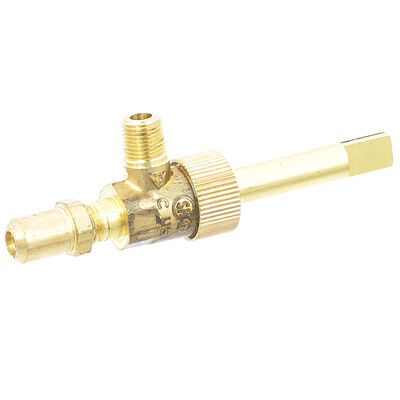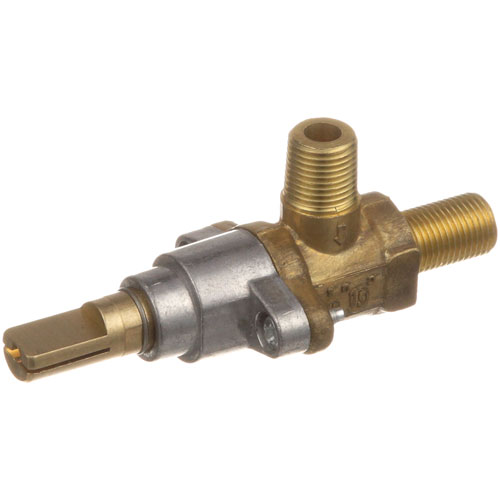
Garland 4530671 Range Burner Valve 3/8-27 Outlet 1/8" NPT Inlet
Description
Dimensions:
- Weight: 0.19 lbs
Gas Flow Control:
Regulates the amount of gas passing from the manifold toward the connected burner assembly. Changes in valve position alter the available gas flow, allowing the burner to operate at different flame settings. Consistent valve movement helps provide controlled adjustment of fuel delivery during normal operation.
Gas Connection:
Forms part of the gas pathway between the range manifold and the burner assembly. Proper connection and sealing are necessary for controlled gas movement through the valve. The valve configuration should match the existing equipment arrangement to maintain the intended gas-control setup.
Replacement Guidelines:
Replace the Gas Range Open Top Burner Valve Without Hood if it is damaged, cracked, deformed, corroded, leaking, or no longer provides proper burner gas-flow control. The part number 4530671 and the Less Hood configuration should be verified before replacement to ensure the correct open burner valve is selected. Replace the valve if deterioration affects gas flow, connection integrity, sealing, burner control, or normal range operation.
Common Failure Symptoms:
- Burner flame does not respond normally to valve-position changes.
- Gas flow becomes inconsistent at different control positions.
- Valve movement becomes difficult or irregular.
- Visible damage or corrosion develops on the valve body.
- Signs of gas leakage appear around the valve connection area.
Equipment Compatibility:
The Garland 4530671 Gas Range Open Top Burner Valve Without Hood is intended for equipment requiring this specific valve configuration. Verify the equipment model, manufacturer part number, burner arrangement, and valve configuration before purchase.
Technical Specifications:
Brand: Garland
Part Number: 4530671
Product Name: Open Burner Knob Kit
Equipment type: Commercial Gas Range
GARLAND:
IMPERIAL:
1610 IMP1610
JADE RANGE:
440-123-000 440-142-000 440-185-000 441100000 4411000000 44185 4418500000
Step1: Turn off the gas supply and power.
Step2: Remove the control panel to access the valve.
Step3: Disconnect gas lines using proper wrenches.
Step4: Remove the old valve and apply thread sealant to the fittings.
Step5: Install a new valve and reconnect the lines securely.
Step6: Restore gas and check carefully for leaks.
-
Can I use this burner valve in different types of cooking appliances?
Yes, this burner valve is versatile and suitable for a wide range of gas-powered commercial kitchen equipment like stoves, grills, ovens, and ranges.
-
Is installation complicated for this burner valve?
No, installation is straightforward due to its compact design and standard inlet/outlet dimensions, making it a convenient choice for equipment maintenance.
-
How long does the Garland 4530671 Burner Valve without Hood typically last?
With its durable construction, this burner valve is built to withstand the demands of a busy kitchen, providing long-lasting performance.
-
What maintenance is required for the Garland 4530671 Burner Valve?
Regularly inspect the burner valve for gas leaks, corrosion, or debris around the inlet and outlet fittings. Clean external surfaces and ensure secure connections. Test valve operation periodically and always shut off the gas supply before servicing.
-
What are the common issues with the Garland 4530671 Burner Valve?
- Fuel leakage at connections
- Sticking or slow valve response
- Inconsistent flame or heat output
- Damage to the threads is causing poor sealing.
-
What does a burner valve control on a gas range?
A burner valve controls the gas supply associated with a range burner. It is part of the control path that determines how the burner receives gas during operation.
-
Why is the Garland 4530671 specified for an open top burner?
The open-top burner designation identifies the particular burner arrangement associated with this valve. This distinction is useful when separating open-top cooking components from valves used in other gas-range applications.
-
What does "without hood" mean on the Garland 4530671?
"Without hood" describes the configuration identified for this valve. It indicates that the listed valve version does not include a hood as part of its configuration.
-
What makes a gas burner valve different from a burner knob?
A burner valve is part of the gas-control hardware, while a knob is the external interface used by the operator. The valve manages the gas-control path behind the operator control.
-
What should buyers look for when evaluating the condition of an open-top burner valve?
Visible damage, leakage, or changes in burner response can indicate that the valve's condition should be evaluated. These signs are more relevant to the valve itself than to the external burner knob.
Customer Reviews
Write a Review
-
Flame Control Restored
Burner flame was unstable before replacement. New valve allows proper adjustment and control.
-
Great Value
This Burner Valve provides excellent control and durability. It's a wonderful fit for my system and has greatly increased performance.
-
Reliable Control
Reliable and durable valve, very satisfied
-
Works Great
Smooth valve adjustments, no gas leaks
-
Safe & effective
Robust valve, perfect for demanding applications
We strive to provide our customers with a hassle-free and efficient shopping experience. Our shipping policy ensures the timely delivery of your orders and complete customer satisfaction. View More
We are committed to ensuring your complete satisfaction with every purchase. We understand that circumstances may arise where you must return a product or request a refund. If for any reason you are not satisfied, you may return the item(s) according to the terms outlined below. View More
This Payment Policy outlines the terms and conditions governing all payments made for products purchased through our website. By making a purchase, you agree to be bound by this Payment Policy. View More