
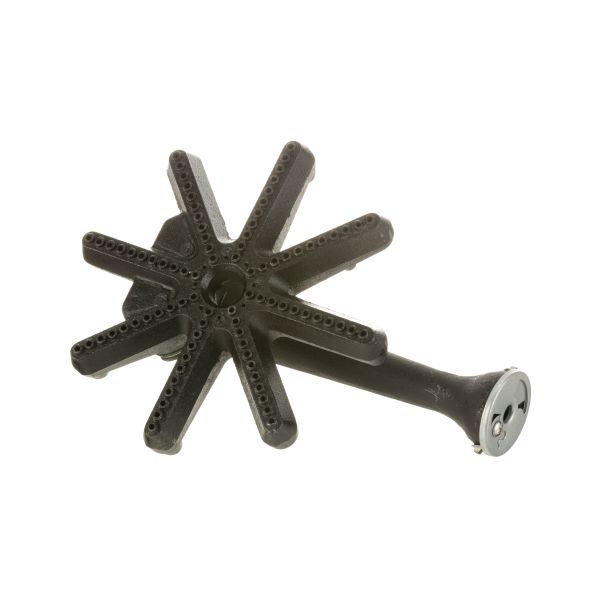
Montague 3347-2 Complete Front Burner W/ Air Shutter

Special Price $123.90 Regular Price $300.00
In stock
SKU
3347-2
Manufacturer:

The Montague 3347-2 Complete Front Burner with Air Shutter is an accessory that is compatible with the Newco Coffee models C, L, N, and R. This part has an indicator knob and two wires for installation and use of the product with the help of these wires. The air shutter is used to improve the performance of the burner by regulating the flow of air thus improving the combustion process, heat provision and energy conservation. This makes it possible for the equipment to be used in harsh environments and at the same time, the installation process is easy. This burner is perfect for improving the effectiveness of Newco coffee equipment and the utilization of energy.

Dimensions

  • Length: 12 In
  • Width: 9 In
  • Height: 4.5 In
  • Weight: 7.44 lbs
https://partsfe.com/media/catalog/product/m/o/montague-3347-2-complete-front-burner-w-air-shutter.jpg

Product Notes

  • Includes: Air Shutter
Write Your Own Review
You're reviewing:Montague 3347-2 Complete Front Burner W/ Air Shutter
Your Rating
Customer Questions
What is the Best Electric Griddle?

Electric Griddle is an electronic equipment that uses an electric element as its heat source. It has a large cooking surface often made up of nonstick material. Electric Griddle has a surface which you do not find in the regular stovetop cookware. ...

What maintenance is required for the Montague 3347-2 Burner With Air Shutter?

Clean burner ports regularly and remove grease or debris buildup to ensure efficient combustion. Inspect the air shutter for proper alignment and adjust airflow as needed. Check gas connections and ignition performance routinely to maintain safe, consistent operation.

What are common issues with the Montague 3347-2 Burner With Air Shutter?

  • Uneven flame or weak ignition due to clogged burner ports.
  • Improper air-fuel mixture causing yellow flames or soot buildup.
  • Gas flow inconsistencies or delayed ignition from worn components.
  • Burner instability or fluctuating flame under variable load conditions.

We strive to provide our customers with a hassle-free and efficient shopping experience. Our shipping policy ensures the timely delivery of your orders and complete customer satisfaction. View More

We are committed to ensuring your complete satisfaction with every purchase. We understand that circumstances may arise where you must return a product or request a refund. If for any reason you are not satisfied, you may return the item(s) according to the terms outlined below. View More

This Payment Policy outlines the terms and conditions governing all payments made for products purchased through our website. By making a purchase, you agree to be bound by this Payment Policy. View More

Installation Steps

Step1: Disconnect gas supply and ensure the unit is fully cool and isolated before starting.

Step2: Remove burner grates, top sections, and access the front burner assembly area.

Step3: Detach the old burner by disconnecting gas inlet and lifting it from mounting supports.

Step4: Install the new burner assembly, aligning it with the gas orifice and securing it in place.

Step5: Reconnect gas fitting tightly and ensure the air shutter is properly positioned for correct airflow.