
Cecilware X207A Conversion To LP

$56.77
In stock
SKU
X207A
Manufacturer:
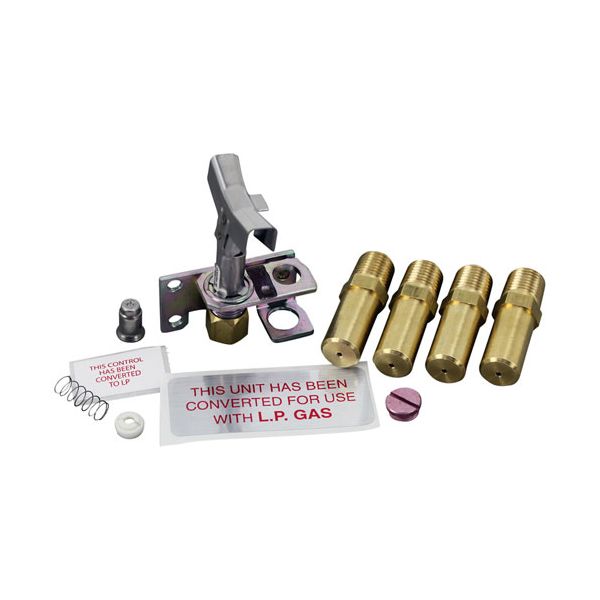
The Cecilware X207A Conversion to LP Kit is used to converting natural gas fryers. It has four burner orifices #52 x 1 3/4 inch, natural/LP pilot #51-1467, and other parts including red cap, adjustable screw, spring, and label #51-1363. The Cecilware fryers have this conversion kit where customers can fry on LP Gas and this makes it compatible with fryers. This type benefits users who require frequent changes of fueling options as it has a safe and efficient performance with a simple connection. better for restaurants and kitchen that need compatibility with LP gas.

Dimensions

  • Length: 5.5 In
  • Width: 4 In
  • Height: 2.5 In
  • Weight: 0.7 lbs
https://partsfe.com/media/catalog/product/c/e/cecilware-x207a-conversion-to-lp-72289.jpg

Product Notes

  • Nat To Lp Conversion Kit
  • 4 Ea Burner Orifice #52 X 1 3/4", # 26-2048
  • Nat/Lp Pilot # 51-1467,
  • Red Cap, Adj Screw, Spring & Label # 51-1363
  • Cecleware Fryer
CECILWARE:
GRINDMASTER:
Write Your Own Review
You're reviewing:Cecilware X207A Conversion To LP
Your Rating
Customer Questions
What maintenance is required for the Cecilware X207A Conversion To LP?

Inspect gas fittings regularly for leaks or loose joints. Verify conversion settings are correctly calibrated for LP operation. Clean surrounding components to prevent debris buildup and ensure safety. Perform checks with gas supply turned off.

What are common issues with the Cecilware X207A Conversion To LP?

  • Gas leak at connection points due to improper fitting.
  • Incorrect conversion leading to uneven flame performance.
  • Regulator mismatch causing pressure instability.
  • Burner ignition difficulty after conversion.
  • Calibration drift affecting consistent operation.

We strive to provide our customers with a hassle-free and efficient shopping experience. Our shipping policy ensures the timely delivery of your orders and complete customer satisfaction. View More

We are committed to ensuring your complete satisfaction with every purchase. We understand that circumstances may arise where you must return a product or request a refund. If for any reason you are not satisfied, you may return the item(s) according to the terms outlined below. View More

This Payment Policy outlines the terms and conditions governing all payments made for products purchased through our website. By making a purchase, you agree to be bound by this Payment Policy. View More

Installation Steps

Step1: Turn off gas supply and disconnect electrical power before starting.

Step2: Remove burner access panels and carefully shut off and disconnect existing gas orifices and pilot components.

Step3: Replace all burner orifices, pilot assembly parts, and regulator components included in the kit.

Step4: Install orifices securely and ensure proper seating and alignment.

Step5: Reassemble burner system and reconnect all gas fittings tightly.