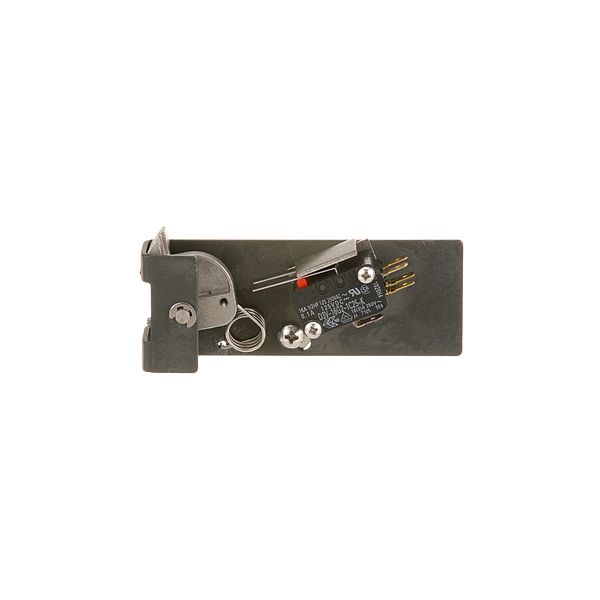
Turbochef ENC3050 Oven Door Switch Assembly

Special Price $151.08 Regular Price $232.79
In stock
SKU
ENC3050
The TurboChef ENC3050 Door Switch Assembly serves as an essential part which improves both functionality and safety for convection and microwave ovens with NGC, NGC2, NGO. The assembly incorporates a durable bracket with two microswitches which controls door operations to deliver dependable performance while avoiding Open Door error messages. The key advantage of this switch assembly comes from its redesigned placement of the secondary switch at the top of the left hinge which minimizes the chance of sequence errors with the switches. Your oven will experience both enhanced operation and extended longevity through this design improvement.

Dimensions

  • Length: 6.5 In
  • Width: 5 In
  • Height: 2 In
  • Weight: 0.47 lbs
https://partsfe.com/media/catalog/product/t/u/turbochef-enc3050-oven-door-switch-assembly-47451-2.jpg

Product Notes

  • Primary Door Switch,
  • Bracket With Two Microswitches
  • Tubochef Convection & Microwave Oven: Ngc, Ngc2, Ngo/Sota
Write Your Own Review
You're reviewing:Turbochef ENC3050 Oven Door Switch Assembly
Your Rating
Customer Questions
What maintenance is required for the Turbochef ENC3050 Door Switch Assembly?

Regularly inspect the door switch alignment to ensure proper connection when the door closes. Keep the switch area clean and free from grease or food debris that may obstruct movement. Check wiring connections for tightness and signs of wear or heat damage.

What are common issues with the Turbochef ENC3050 Door Switch Assembly?

  • Oven not starting due to failed door interlock.
  • Intermittent operation when door is closed.
  • Misalignment causing false door-open signals.
  • Worn or broken actuator mechanism.
  • Loose or damaged electrical connections.
  • Switch not responding to door movement.

We strive to provide our customers with a hassle-free and efficient shopping experience. Our shipping policy ensures the timely delivery of your orders and complete customer satisfaction. View More

We are committed to ensuring your complete satisfaction with every purchase. We understand that circumstances may arise where you must return a product or request a refund. If for any reason you are not satisfied, you may return the item(s) according to the terms outlined below. View More

This Payment Policy outlines the terms and conditions governing all payments made for products purchased through our website. By making a purchase, you agree to be bound by this Payment Policy. View More

Installation Steps

Step1: Disconnect oven from power and allow cooling. Unplug or isolate breaker.

Step2: Remove outer panel and access door switch area; wear safety gloves.

Step3: Note wiring positions for reference before disassembly.

Step4: Disconnect old switch assembly carefully, avoiding wire damage.

Step5: Install new switch assembly in same position and secure mounting.

Step6: Reconnect wiring securely, ensuring tight terminal connections.

Step7: Reassemble panel and test door operation; ensure safety interlocks function.