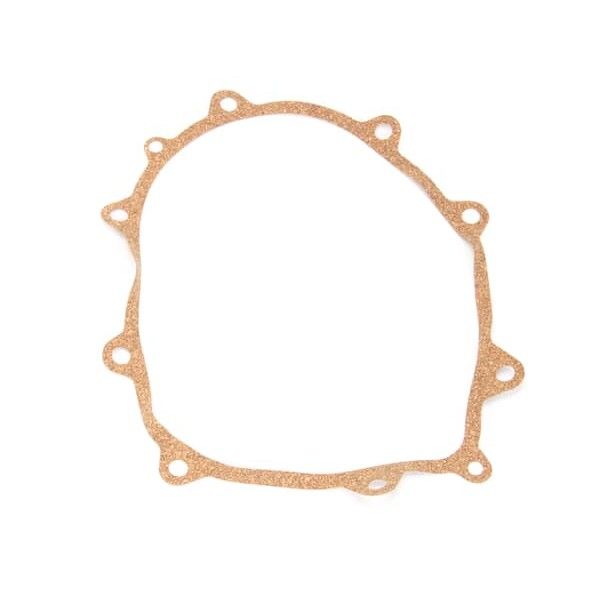
Scotsman A32379-021 Ice Machine Gasket

$61.05
In stock
SKU
A32379-021
Manufacturer:
The Scotsman A32379-021 Ice Machine Gasket is a compressible sealing item, it to seal the gaps between the mating surfaces when the machine door or access panel is closed. This constant contact ensures that the airflow is regulated throughout the ice production cycle. The gasket maintains the stable internal conditions of the unit by restricting the air exchange. This gasket is placed on the circumference of the machine door or service panel and has a special mounting groove so that it can be accurately fitted and held in place.

Dimensions

  • Length: 5 In
  • Width: 4 In
  • Height: 0.5 In
  • Weight: 0.02 lbs
https://partsfe.com/media/catalog/product/s/c/scotsman-a32379-021-gasket-12588-2.jpg

Product Notes

  • Gear Case Gasket
  • Scotsman
  • Af300, Double System Rl Fm-Fme, Double System Rl Nm-Nme,
  • F0522, F0822, F0822L, F1222L, F1522, F1522L, Fm1200,
  • Fm1200R, Fm1202, Fm1202R, Fm1202Rl-C, Fm1500R, Fm2400,
  • Fm2400R, Fm2400Rh, Fm2402, Fm2402R, Fm2402Rh, Fm800, Fm800R,
  • Fme1200, Fme1200R, Fme1204, Fme1204R, Fme1204Rl, Fme1500,
  • Fme1500R, Fme1504R, Fme2400, Fme2400R, Fme2400Rh, Fme2404,
  • Fme2404R, Fme504, Fme800, Fme800R, Fme804, Fme804R,
  • Fme804Rl, Mdt5N25, Mdt5N40, Mdt6N, N Series, N0422, N0622,
  • N0622L, N0922, N0922L, N1322, N1322L, Nd550, Nd650, Nd750,
  • Nde550, Nde554, Nde650, Nde654, Nde754, Nm1250, Nm1250R,
  • Nm1850, Nm1850R, Nm1852, Nm1852R, Nm650, Nm650R, Nm950,
  • Nm950R, Nm952, Nm952R, Nme1250, Nme1250R, Nme1254, Nme1254R,
  • Nme1254Rl, Nme1254Ws-32A, Nme1504Rl, Nme1850, Nme1850R,
Write Your Own Review
You're reviewing:Scotsman A32379-021 Ice Machine Gasket
Your Rating
Customer Questions
What maintenance is required for the Scotsman A32379-021 Gasket?

Clean the gasket surface to remove debris and ensure proper sealing. Inspect for cracks or wear. Ensure correct positioning. Regular checks help maintain tight sealing performance.

What are common issues with the Scotsman A32379-021 Gasket?

  • Cracks causing air or water leaks.
  • Loss of flexibility over time.
  • Improper sealing performance.
  • Wear leading to gaps.

We strive to provide our customers with a hassle-free and efficient shopping experience. Our shipping policy ensures the timely delivery of your orders and complete customer satisfaction. View More

We are committed to ensuring your complete satisfaction with every purchase. We understand that circumstances may arise where you must return a product or request a refund. If for any reason you are not satisfied, you may return the item(s) according to the terms outlined below. View More

This Payment Policy outlines the terms and conditions governing all payments made for products purchased through our website. By making a purchase, you agree to be bound by this Payment Policy. View More

Installation Steps

Step1: Turn off and unplug unit to prevent electrical shock, allow surfaces to cool.

Step2: Remove access panel and carefully peel off old gasket from channel.

Step3: Clean mounting surface thoroughly to ensure proper seal before installation.

Step4: Align and press new gasket evenly and firmly into channel.

Step5: Secure panel back in place and close door firmly ensure correct alignment.

Step6: Restore power and check for air or moisture leaks verify sealing.