
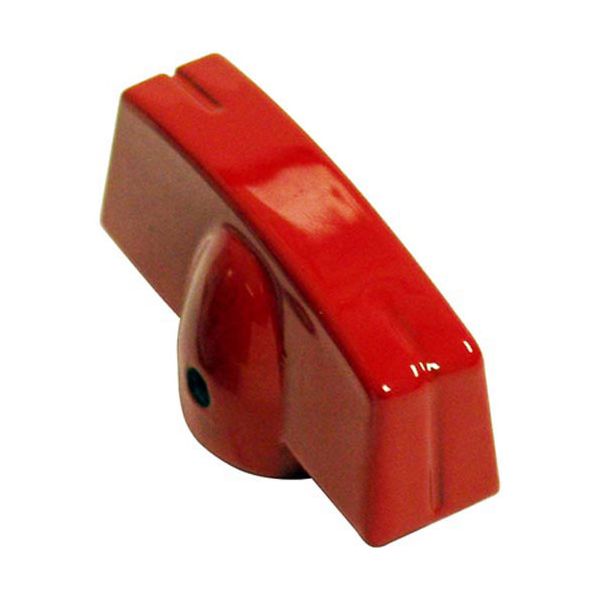
Vulcan Hart 00-402957-00002 Range Gas Cock Handle Red

$19.84
In stock
SKU
00-402957-00002
The Vulcan Hart 00-402957-00002 Range Gas Cock Handle is a color-coded control unit that is utilized to control the flow of gas in compatible commercial applications. The red handle allows easy visual recognition and it provides the operators the option of controlling the gas cock valve manually to control the burners. It is installed at the front control assembly to convert the movement of the hands to the adjustment of the valve to have the correct fuel management. It is also a vital part of the regular work of restaurant kitchens.

Dimensions

  • Length: 2 In
  • Width: 0.75 In
  • Height: 2 In
  • Weight: 0.1 lbs
https://partsfe.com/media/catalog/product/v/u/vulcan-hart-00-402957-00002-red-color-aluminum-knob-1-7-8-x-7-8-mount-3-8-round-240-flat-d-hole-10894-2.jpg

Product Notes

  • Aluminum Knob Painted Red [ 1-7/8" X 7/8" ]
  • [Mount 3/8" Round].240" D Hole,[Flat D], Set Screw Down
  • (Note: For Polished Aluminum Use # 22-1200 )
  • (For Black Aluminum Use # 22-1298 )
  • Vulcan
  • Broiler Hcb44 (Old 7844L), Hcbo40 (Old 7840Al).
  • Grill Where Applicable.
  • Oven 24L,36(L,Lc),48L,60(L,Lc,Lcc), 148(L,Lc), 160(L,Lc),
  • 260(L, Lc,Lcc), 481(L,Lc), 8030
Write Your Own Review
You're reviewing:Vulcan Hart 00-402957-00002 Range Gas Cock Handle Red
Your Rating
Customer Questions
What maintenance is required for the Vulcan Hart 00-402957-00002 Knob?

Regularly inspect the knob for cracks, looseness, or wear that could affect equipment control. Clean the surface with a mild detergent to remove grease buildup and maintain smooth operation. Ensure the knob is securely attached before use. Always turn off equipment power before performing maintenance or adjustments.

What are common issues with the Vulcan Hart 00-402957-00002 Knob?

  • Knob becoming loose or difficult to turn.
  • Cracking or surface wear from frequent use.
  • Poor fit on the control shaft.
  • Slipping during operation.

We strive to provide our customers with a hassle-free and efficient shopping experience. Our shipping policy ensures the timely delivery of your orders and complete customer satisfaction. View More

We are committed to ensuring your complete satisfaction with every purchase. We understand that circumstances may arise where you must return a product or request a refund. If for any reason you are not satisfied, you may return the item(s) according to the terms outlined below. View More

This Payment Policy outlines the terms and conditions governing all payments made for products purchased through our website. By making a purchase, you agree to be bound by this Payment Policy. View More

Installation Steps

Step1: Turn off and unplug the equipment to prevent electrical shock.

Step2: Remove the old knob by pulling it straight off the control shaft.

Step3: Align the flat side of the knob’s D-hole with the shaft’s flat edge.

Step4: Slide the new knob firmly onto the shaft until fully seated.

Step5: Test rotation for smooth, secure operation before restoring power.
