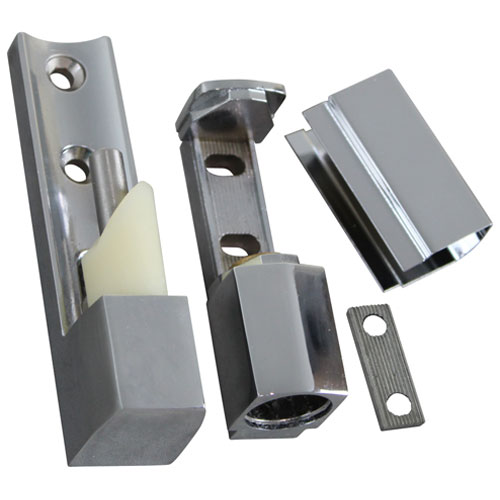
Intermetro RPC14-042 Polished Chrome Edgemount Hinge Offset 7/8", Length 4-5/16", Width 1-1/8"
Specifications:
- Edgemount Hinge, Polished Chrome, Sold Each.
- Offset 7/8"
- Length 4-5/16"
- Width 1-1/8"
- Frame Mount Screw Centers 1" & 1-1/16"
- Outside Screw Centers 2-1/16"
- Door Screw Centers 7/8"
- Series 215, R45-1010
Description
Dimensions:
- Weight: 0.86 lbs
- Length: 7 in
- Height: 1.5 in
- Width: 3.5 in
CARTER HOFFMAN:
CHG:
CHGR45-1010 R45-1010
FOOD WARMING EQUIPMENT:
HNG LIFT-OFF 215 HNG LIFTOFF 215 HNG-LIFT-OFF-215 HNGLIFTOFF215
HENNY PENNY:
Step1: Disconnect power and ensure the door or panel is fully supported before starting.
Step2: Mark hinge placement along the edge where alignment is required.
Step3: Drill pilot holes matching the hinge mounting points.
Step4: Position the hinge and secure with proper screws.
Step5: Check door movement and alignment, adjusting as needed.
Step6: Tighten all screws firmly and test for smooth, stable operation.
-
What maintenance is required for the Intermetro RPC14-042 Hinge?
Clean the hinge regularly with a non-abrasive cleaner to prevent buildup and corrosion. Lubricate the hinge pivot lightly to ensure smooth movement. Inspect mounting screws for tightness and alignment. Avoid harsh chemicals to protect finish.
-
What are common issues with the Intermetro RPC14-042 Hinge?
- Chrome surface pitting or discoloration from moisture exposure.
- Hinge stiffness or squeaking due to lack of lubrication.
- Loose screws causing misalignment and uneven door movement.
- Cam damage leading to reduced smooth closing action.
Customer Reviews
No reviews yet. Be the first to write one!
Write a Review
We strive to provide our customers with a hassle-free and efficient shopping experience. Our shipping policy ensures the timely delivery of your orders and complete customer satisfaction. View More
We are committed to ensuring your complete satisfaction with every purchase. We understand that circumstances may arise where you must return a product or request a refund. If for any reason you are not satisfied, you may return the item(s) according to the terms outlined below. View More
This Payment Policy outlines the terms and conditions governing all payments made for products purchased through our website. By making a purchase, you agree to be bound by this Payment Policy. View More