
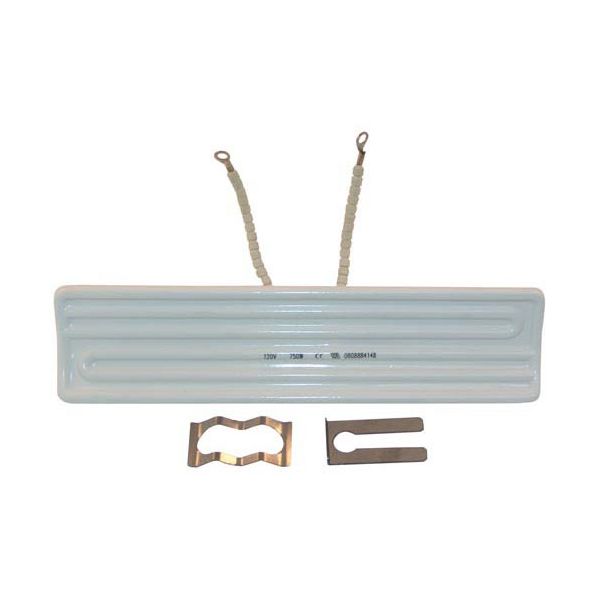
Hatco HT2.07.001.00 Warmer Ceramic Element W/ Bracket 9-5/8" X 2-1/4"

Special Price $110.20 Regular Price $200.00
In stock
SKU
HT2.07.001.00
Manufacturer:

The Hatco HT2.07.001.00 Warmer Ceramic Element with Bracket functions as a high-performance heating component that serves food service equipment needs. The ceramic element maintains precise food temperatures through its 9-5/8" x 2-1/4" dimensions. This durable heating component works optimally for commercial warming stations and heat lamps together with other applications requiring steady heat delivery. The bracket that comes with this product enables simple installation. The element operates to minimize energy usage and delivers dependable consistent heating which improves food service operational efficiency.

Dimensions

  • Length: 10 In
  • Width: 2.75 In
  • Height: 1.5 In
  • Weight: 0.79 lbs
https://partsfe.com/media/catalog/product/h/a/hatco-ht2-07-001-00-warmer-ceramic-element-w-bracket-9-5-8-x-2-1-4-23983.jpg

Product Notes

  • Ceramic 9-5/8" X 2-1/4"
  • With Bracket 10-1/4" X 6"
  • Wire Leads W/ Ring Terminals
  • Hatco Warmer Model Ha1-1186, Grfsc-24
Write Your Own Review
You're reviewing:Hatco HT2.07.001.00 Warmer Ceramic Element W/ Bracket 9-5/8" X 2-1/4"
Your Rating
Customer Questions
What maintenance is required for the Hatco HT2.07.001.00 Ceramic Element?

Clean the element surface gently to remove debris and grease. Inspect for cracks or wear. Check electrical connections for tightness. Proper maintenance ensures consistent heat distribution and efficient warmer operation.

What are common issues with the Hatco HT2.07.001.00 Ceramic Element?

  • Cracking of ceramic material affecting heating performance.
  • Uneven or insufficient heat output during operation.
  • Loose or damaged wiring causing intermittent performance.
  • Overheating in certain areas reducing efficiency.
  • Element failure leading to complete loss of heating.

We strive to provide our customers with a hassle-free and efficient shopping experience. Our shipping policy ensures the timely delivery of your orders and complete customer satisfaction. View More

We are committed to ensuring your complete satisfaction with every purchase. We understand that circumstances may arise where you must return a product or request a refund. If for any reason you are not satisfied, you may return the item(s) according to the terms outlined below. View More

This Payment Policy outlines the terms and conditions governing all payments made for products purchased through our website. By making a purchase, you agree to be bound by this Payment Policy. View More

Installation Steps

Step1: Turn off and unplug the warmer before starting installation.

Step2: Remove the old element and bracket carefully.

Step3: Position the new element into the warmer’s slot.

Step4: Secure the element using the provided bracket and screws.

Step5: Ensure all connections are tight and wires are not pinched.

Step6: Plug in and test the warmer.

Step7: Avoid touching the element while powered to prevent burns.