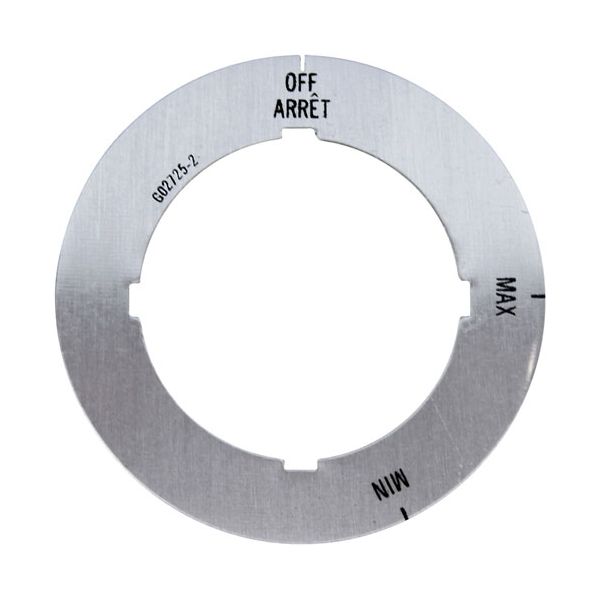
Garland G02725-2 Oven Dial Insert OFF-MAX-MIN

Special Price $14.84 Regular Price $18.54
In stock
SKU
G02725-2
The Garland G02725-2 Oven Dial Insert OFF-MAX-MIN is a control interface component that is used on commercial cooking systems. This dial insert is provided as an insert in one of the control knobs to show the settings so as to have a clear reference point in temperature or power adjustments. It is applied when maintaining or replacing to regain proper control indication. The insert is an element of the control panel assembly of the appliance that fits in the knob and the internal regulators.

Dimensions

  • Length: 2.25 In
  • Width: 2.25 In
  • Height: 0.125 In
  • Weight: 0.1 lbs
https://partsfe.com/media/catalog/product/g/a/garland-g02725-2-insert-off-max-min-39518-2.jpg

Product Notes

  • Dial Insert, Off-Max-Min,
  • Garland Broiler 18B, 24B, 30B, 36B, 48B, G24-24Gth,
  • G24-36Gth, G24-48G, G24-60G, G24-72G, Ir34-40, Ir36-280,
  • Ir48-280, Ir60-280, Ir72-280 Close
Write Your Own Review
You're reviewing:Garland G02725-2 Oven Dial Insert OFF-MAX-MIN
Your Rating
Customer Questions
What maintenance is required for the Garland G02725-2 Insert?

Regularly inspect for wear, corrosion, or buildup that may affect performance. Clean it using a non-abrasive cloth and approved cleaner to avoid damaging surfaces. Ensure it is properly seated and securely fitted during use. Periodic checks can maintain consistent operation and prevent fitting issues or equipment pressure.

What are common issues with the Garland G02725-2 Insert?

  • Loose fitting or improper seating causing unstable operation.
  • Wear or deformation from repeated thermal or mechanical pressure.
  • Buildup of debris affecting alignment or performance.
  • Difficulty connecting or disconnecting within the equipment housing.

We strive to provide our customers with a hassle-free and efficient shopping experience. Our shipping policy ensures the timely delivery of your orders and complete customer satisfaction. View More

We are committed to ensuring your complete satisfaction with every purchase. We understand that circumstances may arise where you must return a product or request a refund. If for any reason you are not satisfied, you may return the item(s) according to the terms outlined below. View More

This Payment Policy outlines the terms and conditions governing all payments made for products purchased through our website. By making a purchase, you agree to be bound by this Payment Policy. View More

Installation Steps

Step1: Turn off main power/gas supply and allow equipment to fully cool.

Step2: Remove old insert panel carefully using proper tools.

Step3: Align new insert with control slot ensuring correct alignment.

Step4: Secure into housing clips/screws.

Step5: Connect control linkage.

Step6: Restore power and check operation.

Step7: Wear gloves and ensure secure fit.