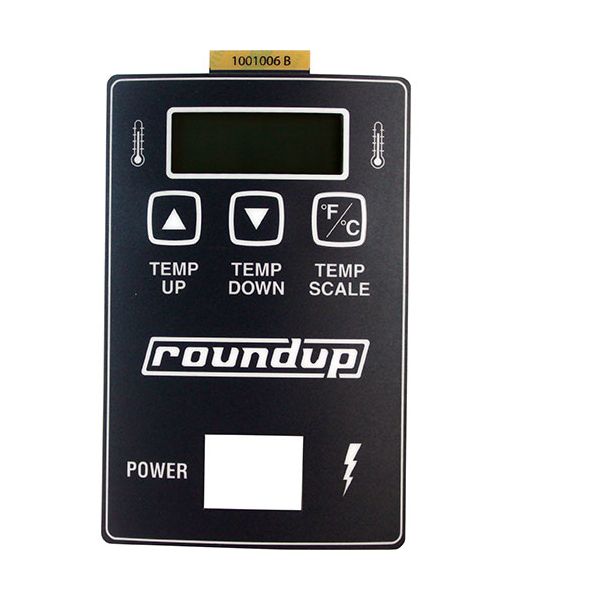
Antunes 1001006 Control Label

Special Price $15.60 Regular Price $16.95
In stock
SKU
1001006
The Roundup - AJ Antunes 1001006 Control Label is used to represent switch position settings on the control panel by displaying text and symbols on the panel. It operates by sticking to the surface surrounding knobs or buttons to direct operators to the right options. The label is attached to the front control panel of compatible equipment so that it is aligned with the corresponding controls. This spare part is a component of the interface that assists the user in understanding control operations when using it.

Dimensions

  • Length: 6 In
  • Width: 4 In
  • Height: 0.5 In
  • Weight: 0.02 lbs
https://partsfe.com/media/catalog/product/a/n/antunes-1001006-label-control-95973-2.jpg

Product Notes

  • 5-3/4" X 3-3/4"
  • Roundup Vct-(200, 250, 2000)
FRANKLIN CHEF:
ROUNDUP:
1001006, 1010906, AJA1010906, ROU1001006
Write Your Own Review
You're reviewing:Antunes 1001006 Control Label
Your Rating
Customer Questions
What maintenance is required for the Antunes 1001006 Control Label?

The control label should be kept clean and free from dust, grease, and moisture to preserve readability. Avoid abrasive cleaning agents that may damage the printed surface. Inspect regularly and replace if peeling or fading occurs.

What are common issues with the Antunes 1001006 Control Label?

  • Fading print over time.
  • Moisture or grease damage.
  • Dirt buildup reducing readability.
  • Misalignment on control panel.

We strive to provide our customers with a hassle-free and efficient shopping experience. Our shipping policy ensures the timely delivery of your orders and complete customer satisfaction. View More

We are committed to ensuring your complete satisfaction with every purchase. We understand that circumstances may arise where you must return a product or request a refund. If for any reason you are not satisfied, you may return the item(s) according to the terms outlined below. View More

This Payment Policy outlines the terms and conditions governing all payments made for products purchased through our website. By making a purchase, you agree to be bound by this Payment Policy. View More

Installation Steps

Step1: Turn off and unplug the equipment to ensure safety.

Step2: Locate the existing control label area and remove any old or damaged label.

Step3: Clean the surface thoroughly to remove dust, grease, or residue.

Step4: Peel backing from the new label carefully without touching adhesive.

Step5: Align and apply the label evenly, pressing firmly to avoid bubbles.

Step6: Reconnect power after ensuring proper placement.