
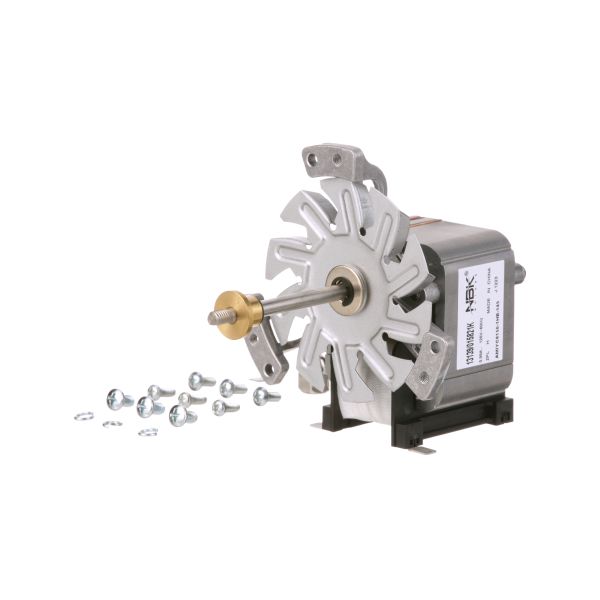
Moffat M015821K Blower Motor W/Mounting Hardware & Gasket 120V

Special Price $364.27 Regular Price $615.75
In stock
SKU
M015821K
Manufacturer:

The Moffat M015821K Blower⁠ Motor W/Mounting Hardware & Ga‌sket is an electric part used in compatible co‍m‍m‍ercial cooki⁠ng equipment to drive airflow through internal ventilation o‍r combustion systems. The​ un⁠it operates on⁠ a‌ 120V electrical supply and converts electrical energy into mechani⁠cal ro⁠tation to spin an internal‌ fan or blower w‍heel. It includes mounting hardware, a gas‌ket, a⁠nd a shaft​ to support installation and a‍ linkage within the equipment housing. The assembly connects to existing electrical terminals and mechani⁠cal coupl​ings, all‍owing integration into blower systems that regulate air movement within ovens or‍ similar appliances for controlled airflow ope⁠r‍ation⁠.

Dimensions

  • Length: 5.375 In
  • Width: 5.375 In
  • Height: 4.625 In
  • Weight: 2.67 lbs
https://partsfe.com/media/catalog/product/m/o/moffat-m015821k-blower-motor-with-mounting-hardware-gasket-shaft-120v-82042.jpg

Product Notes

  • Motor With Mounting Hardware, And Instructions
  • 120V, 50/60Hz, W/ Gasket, Shaft 2-3/4" X 15/64" Dia.
  • Fits Moffat Models~
  • G32, G32M, G32Ms
Write Your Own Review
You're reviewing:Moffat M015821K Blower Motor W/Mounting Hardware & Gasket 120V
Your Rating
Customer Questions
What maintenance is required for the Moffat M015821K Blower Motor With Mounting Hardware Gasket shaft?

Inspect and clean the blower motor and shaft regularly to prevent dust buildup. Ensure mounting hardware and gasket remain secure to avoid vibration. Check electrical connections for tightness and signs of wear to maintain safe, efficient operation.

What are common issues with the Moffat M015821K Blower Motor With Mounting Hardware Gasket shaft?

  • Overheating or motor burnout due to blocked airflow.
  • Loose mounting hardware causing vibration or noise.
  • Gasket wear leading to air leakage and reduced efficiency.
  • Electrical connection issues causing intermittent operation or startup failure.

We strive to provide our customers with a hassle-free and efficient shopping experience. Our shipping policy ensures the timely delivery of your orders and complete customer satisfaction. View More

We are committed to ensuring your complete satisfaction with every purchase. We understand that circumstances may arise where you must return a product or request a refund. If for any reason you are not satisfied, you may return the item(s) according to the terms outlined below. View More

This Payment Policy outlines the terms and conditions governing all payments made for products purchased through our website. By making a purchase, you agree to be bound by this Payment Policy. View More

Installation Steps

Step1: Disconnect power supply and verify zero voltage before starting.

Step2: Remove old blower assembly and clean mounting surface thoroughly.

Step3: Position gasket and align motor correctly.

Step4: Secure using mounting hardware and tighten evenly.

Step5: Connect wiring per diagram, ensuring proper insulation and safety.

Step6: Check shaft alignment, tighten fasteners, then restore power and test airflow.

Step7: Ensure all guards are in place and wear protective gloves during operation.