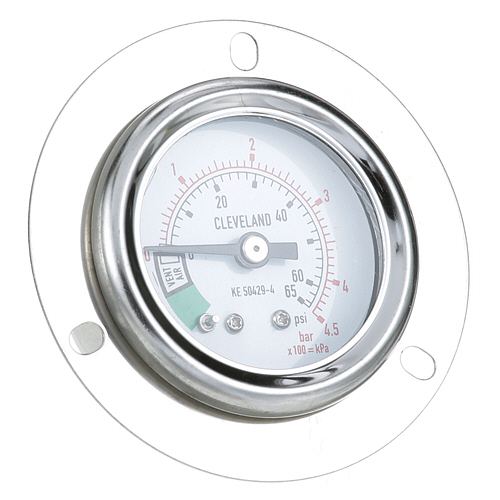
Cleveland KE50429-6 Kettle Pressure Gauge
Description
Dimensions:
- Weight: 0.22 lbs
- Length: 2.75 in
- Height: 2.25 in
- Width: 2.5 in
| Manufacturer Name: Cleveland Product Number: KE50429-6 OEM Part Number: KE50429-6 Product Description: Pressure Gauge Similar Models:NONE Dimensions: Length:2.75in/6.98cm Width:2.5in/6.35cm Height:2.25in/5.72cm Weight:0.22lbs/99.79g |
Choose the best Commercial kitchen & Restaurant equipment parts and supplies from PartsFe!
Same Day Shipping
Best Quality And Best Price
Wide Range of Inventory
Best Customer Service
Have More Questions or Need Help to Place The Order?
Reach us at 866-863-0907 or contact@partsfe.com
Step1: Turn off power and allow the equipment to cool completely.
Step2: Depressurize the system fully before removing the existing gauge.
Step3: Unscrew the old gauge from the back-mount connection using proper tools.
Step4: Apply thread sealant and install the new gauge in the correct orientation.
Step5: Tighten securely without over-torquing.
Step6: Restore operation and verify accurate pressure readings with no leaks.
-
What maintenance is required for the Cleveland KE50429-6 Pressure Gauge?
Regularly inspect the pressure gauge for leaks, blockages, and calibration drift to ensure accurate readings. Clean the connection port gently to avoid debris buildup. Preventive checks maintain accuracy and safety in pressure monitoring systems.
-
What are common issues with the Cleveland KE50429-6 Pressure Gauge?
- Inaccurate readings due to calibration drift over time.
- Clogged sensing port restricting pressure flow and response.
- Leakage at threaded connections or seals causing pressure loss.
- Sticking or fluctuating needle movement affecting gauge stability.
Customer Reviews
No reviews yet. Be the first to write one!
Write a Review
We strive to provide our customers with a hassle-free and efficient shopping experience. Our shipping policy ensures the timely delivery of your orders and complete customer satisfaction. View More
We are committed to ensuring your complete satisfaction with every purchase. We understand that circumstances may arise where you must return a product or request a refund. If for any reason you are not satisfied, you may return the item(s) according to the terms outlined below. View More
This Payment Policy outlines the terms and conditions governing all payments made for products purchased through our website. By making a purchase, you agree to be bound by this Payment Policy. View More