
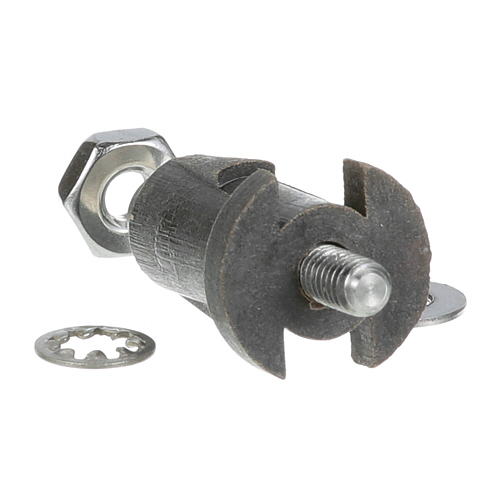
Bunn 07412.1002 Probe Replacement Kit
Specifications:
- Probe Replacement Kit
- Bunn Axiom, Cdbc, Cdbc Aps, Cdbc Series, Cdbc Twin, Cdbc
- Twin Aps, Cdbcf, Cdbcf Aps, Cdbcf-Lptc, Cdbcfp, Cdbcp, Cez,
- Cez Twin, Cez Twin Aps, Cezf, Fmd Dbc-3, Fmd-1, Fmd-2,
- Fmd-3, Fmd-4, Fmd-5, Fmda Dbc-3, Hc-1, Hc-2, Hc-3, Icb, Icb
- Twin, Icb-Dv, Itcb, Itcb-Dv, Lca-2 Lp, Lcc-2 Lp, Single Cd,
- Single Cdf, Itcb
Description
Dimensions:
- Weight: 0.3 lbs
- Length: 1.75 in
- Height: 1.75 in
- Width: 0.5 in
Step1: Disconnect the brewer from electrical power and shut off the water supply before servicing.
Step2: Remove the access panel to locate the existing probe assembly inside the brewer.
Step3: Disconnect the probe wire and carefully remove the old probe kit.
Step4: Install the new probe securely in the original position and reconnect wiring terminals firmly.
Step5: Reinstall the access panel, restore power and water supply, then test the brewer for proper operation and water-level sensing.
-
What maintenance is required for the Bunn 07412.1002 Probe Replacement Kit?
Keep the probe clean and free from residue that may affect readings. Inspect wiring and connectors for wear or looseness. Ensure proper positioning during installation. Disconnect power before handling to prevent electrical issues or inaccurate calibration.
-
What are common issues with the Bunn 07412.1002 Probe Replacement Kit?
- Inaccurate readings due to residue buildup.
- Intermittent signals from loose connections.
- Wiring damage causing probe malfunction.
- Calibration drift affecting temperature detection.
Customer Reviews
No reviews yet. Be the first to write one!
Write a Review
We strive to provide our customers with a hassle-free and efficient shopping experience. Our shipping policy ensures the timely delivery of your orders and complete customer satisfaction. View More
We are committed to ensuring your complete satisfaction with every purchase. We understand that circumstances may arise where you must return a product or request a refund. If for any reason you are not satisfied, you may return the item(s) according to the terms outlined below. View More
This Payment Policy outlines the terms and conditions governing all payments made for products purchased through our website. By making a purchase, you agree to be bound by this Payment Policy. View More