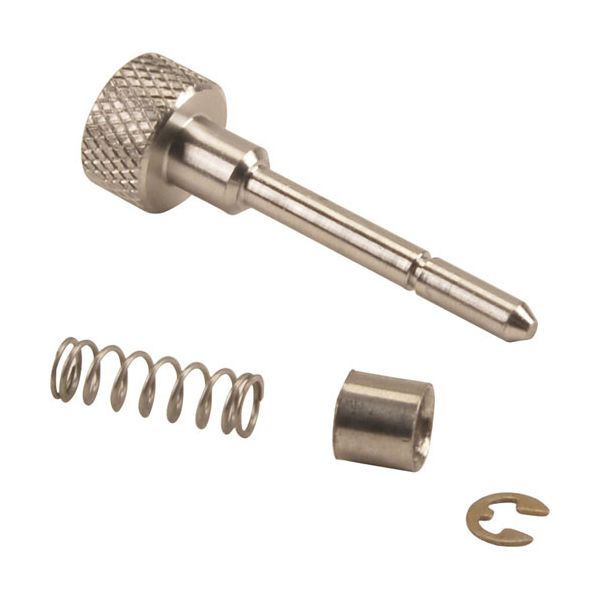
Jet Spray S3150 Handle Pin Assembly

$64.83
In stock
SKU
S3150
Manufacturer:
The Jet Spray S3150 Handle Pin Assembly functions as a secure attachment system that operates smoothly in different applications. Made of durable stainless steel the assembly contains a spring and "E" clip and bushing to deliver extended service life. The assembly measures 1 1/2" in length and 7/16" in outer diameter to deliver dependable connections for smooth operation. The assembly strengthens your spray handle while making it easier to use and extends its operational life through reduced damage which makes it an essential component for equipment efficiency.

Dimensions

  • Length: 3 In
  • Width: 1 In
  • Height: 0.5 In
  • Weight: 0.02 lbs
https://partsfe.com/media/catalog/product/j/e/jet-spray-s3150-handle-pin-assembly-80514.jpg

Product Notes

  • Material: Stainless Steel
  • Length: 1 1/2" | 38 mm
  • Outer Diameter: 7/16" | 11 mm
  • Includes: Spring, "E" Clip, Bushing
CORNELIUS:
JET SPRAY:
Write Your Own Review
You're reviewing:Jet Spray S3150 Handle Pin Assembly
Your Rating
Customer Questions
What maintenance is required for the Jet Spray S3150 Handle Pin Assembly?

Clean the handle pin assembly regularly to remove dirt and residue. Apply light lubrication to moving points to ensure smooth operation. Inspect for damage or looseness and tighten or replace as needed.

What are common issues with the Jet Spray S3150 Handle Pin Assembly?

  • Pin bending or deformation causing misalignment and improper fit.
  • Loose connection leading to unstable handle operation or slipping.
  • Corrosion or rust restricting smooth pin movement and operation.
  • damage of retaining sections causing intermittent handle response.

We strive to provide our customers with a hassle-free and efficient shopping experience. Our shipping policy ensures the timely delivery of your orders and complete customer satisfaction. View More

We are committed to ensuring your complete satisfaction with every purchase. We understand that circumstances may arise where you must return a product or request a refund. If for any reason you are not satisfied, you may return the item(s) according to the terms outlined below. View More

This Payment Policy outlines the terms and conditions governing all payments made for products purchased through our website. By making a purchase, you agree to be bound by this Payment Policy. View More

Installation Steps

Step1: Turn off water supply and depressurize the unit.

Step2: Remove existing handle pin and inspect handle housing for damage.

Step3: Align new handle pin with mounting slot.

Step4: Secure pin firmly using fasteners and tighten evenly.

Step5: Reassemble handle, restore water supply, and test for smooth operation while checking for leaks.

Step6: Ensure no pressure buildup remains before final tightening and verify alignment after first test cycle.