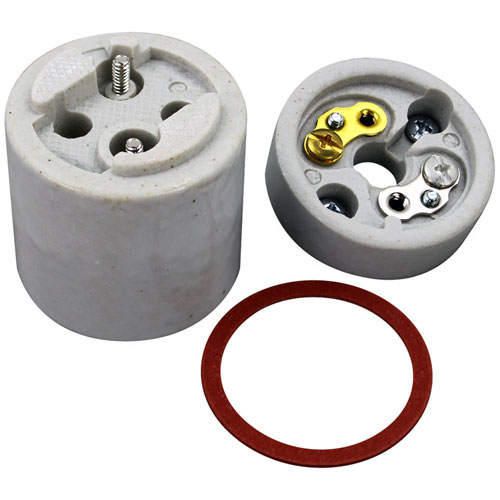
014252 2-Piece Ceramic Lamp Socket Assembly W/ Hardware
Specifications:
- Lamp Socket, 2 Pc Ceramic With Mounting Hardware.
- Semi Assembled.
- Keating Food Warmers
- Nemco Food Warmers
Description
Dimensions:
- Weight: 0.46 lbs
- Length: 2.3 in
- Height: 2 in
- Width: 2 in
Step1: Turn off electrical power and allow equipment to cool completely before servicing.
Step2: Remove protective panels to access lamp housing, noting wiring layout.
Step3: Disconnect old socket wiring, labeling leads for correct reconnection.
Step4: Remove mounting hardware and extract damaged socket carefully.
Step5: Install new socket using supplied hardware, ensuring firm fit.
Step6: Reconnect wires securely to terminals, double-check insulation.
Step7: Restore power and test lamp function, confirming stable operation and no overheating.
-
What maintenance is required for the Keating 014252 Ceramic Lamp Socket Assembly?
Ensure power is turned off and the socket is cool before inspection. Periodically tighten hardware connections and check the ceramic housing for cracks or heat damage. Clean dust buildup and replace worn contacts to maintain safe electrical performance.
-
What are common issues with the Keating 014252 Ceramic Lamp Socket Assembly?
- Overheating or heat discoloration.
- Loose electrical connections.
- Cracked or chipped ceramic housing.
- Corroded terminals or contacts.
- Intermittent power loss.
- Poor bulb fit or contact.
- Arcing at connection points.
- Loose mounting hardware vibration.
Customer Reviews
No reviews yet. Be the first to write one!
Write a Review
We strive to provide our customers with a hassle-free and efficient shopping experience. Our shipping policy ensures the timely delivery of your orders and complete customer satisfaction. View More
We are committed to ensuring your complete satisfaction with every purchase. We understand that circumstances may arise where you must return a product or request a refund. If for any reason you are not satisfied, you may return the item(s) according to the terms outlined below. View More
This Payment Policy outlines the terms and conditions governing all payments made for products purchased through our website. By making a purchase, you agree to be bound by this Payment Policy. View More