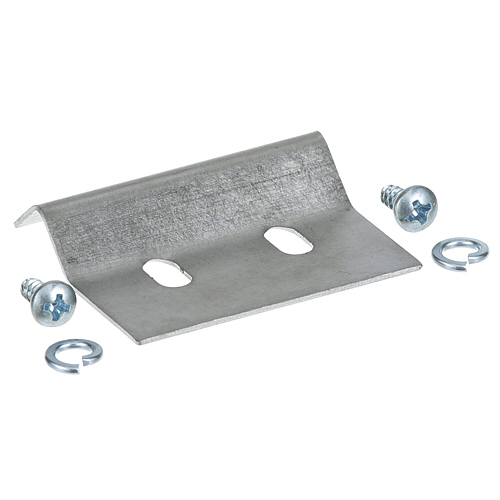
Blodgett 21100 Convection Oven Striker Plate Kit 1-3/4" X 1-9/16"
Specifications:
- Striker Plate
- 1-3/4" X 1-9/16", 2 Slotted Holes
- Blodgett Zephaire E, G
Description
Dimensions:
- Weight: 0.03 lbs
- Length: 2 in
- Height: 0.5 in
- Width: 1.5 in
Step1: Ensure the appliance is turned off and cooled to prevent burns.
Step2: Remove any existing striker plate from the mounting area.
Step3: Align the striker plate with the designated slot or screws.
Step4: Secure the plate firmly using the original or provided fasteners.
Step5: Confirm the plate is properly positioned for door or latch connection.
Step6: Test door operation gently to ensure smooth functionality before use.
-
What maintenance is required for the Blodgett 21100 Striker Plate?
Inspect the striker plate for cracks, bending, or wear at contact points. Wipe clean to remove grease and debris. Ensure screws remain tight, and check alignment with the latch for smooth operation.
-
What are common issues with the Blodgett 21100 Striker Plate?
- Misalignment causing door latching problems.
- Screws loosening over time.
- Cracks or deformation at contact points.
- Surface wear affecting smooth operation.
Customer Reviews
No reviews yet. Be the first to write one!
Write a Review
We strive to provide our customers with a hassle-free and efficient shopping experience. Our shipping policy ensures the timely delivery of your orders and complete customer satisfaction. View More
We are committed to ensuring your complete satisfaction with every purchase. We understand that circumstances may arise where you must return a product or request a refund. If for any reason you are not satisfied, you may return the item(s) according to the terms outlined below. View More
This Payment Policy outlines the terms and conditions governing all payments made for products purchased through our website. By making a purchase, you agree to be bound by this Payment Policy. View More