
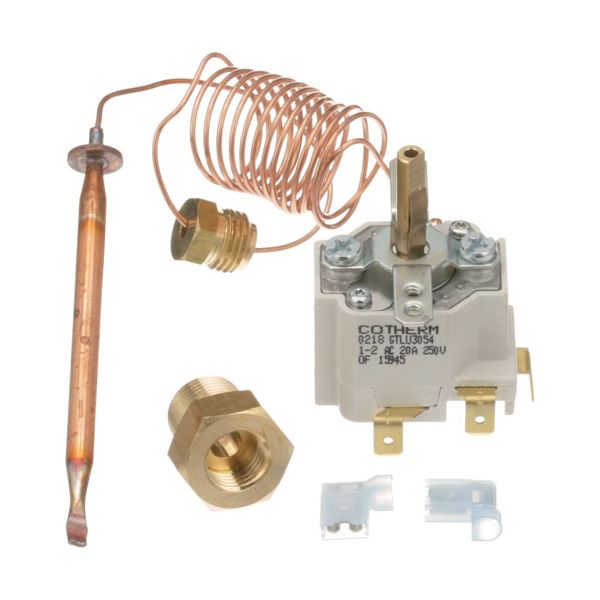
Vulcan Hart 00-881973 Jacketed Kettle Thermostat 140°F-284°F 36" CAP

Special Price $458.73 Regular Price $527.28
In stock
SKU
00-881973
The Vulcan Hart 00-881973 Thermostat 140°F -284°F 36 inch CAP operates by keeping track of the internal kettle temperature and adjusting the heat to the desired temperature. It runs on a capillary mechanism that is sensitive to temperature variations, and it makes fine adjustments between 140°F to 284°F This thermostat is specifically designed to be used with commercial kettles, and it is placed inside the where it can effectively sense and regulate cooking temperatures. The 36 inch length of the capillary allows it to be installed and connected properly to the equipment.

Dimensions

  • Length: 3.5 In
  • Width: 2.7 In
  • Height: 4 In
  • Weight: 0.5 lbs
https://partsfe.com/media/catalog/product/v/u/vulcan-hart-00-881973-oven-thermostat-140-284-f-cap-36-61406-2.jpg

Product Notes

  • T/Stat, Temp: 140-284 F, 80-140 C,
  • Bulb 3/8" X 4" Copper, Cap 36", 3/8" Stuff Box,
  • .187" D-Stem
  • Qty 3 Tab Term 1/4" And 1/4" Ground
  • Market Forge Kettle Elt-40
  • Southbend
ACCUTEMP:
BLODGETT:
CROWN STEAM:
MARKET FORGE:
SOUTHBEND:
VULCAN HART:
Write Your Own Review
You're reviewing:Vulcan Hart 00-881973 Jacketed Kettle Thermostat 140°F-284°F 36" CAP
Your Rating
Customer Questions
What maintenance is required for the Vulcan Hart 00-881973 Thermostat?

Inspect the capillary tube and sensing bulb regularly for kinks, leaks, or corrosion buildup. Ensure all electrical connections are tight and properly insulated to avoid intermittent operation. Keep the thermostat housing clean and free of grease or moisture. Periodic calibration is recommended to maintain accurate temperature control and safe kettle performance.

What are common issues with the Vulcan Hart 00-881973 Thermostat?

  • Temperature drift or inaccurate heating control.
  • Damaged or leaking capillary tube assembly.
  • Faulty sensing bulb causing delayed response.
  • Intermittent heating or failure to cycle correctly.
  • Loose wiring or connection failures leading to inconsistent operation.

We strive to provide our customers with a hassle-free and efficient shopping experience. Our shipping policy ensures the timely delivery of your orders and complete customer satisfaction. View More

We are committed to ensuring your complete satisfaction with every purchase. We understand that circumstances may arise where you must return a product or request a refund. If for any reason you are not satisfied, you may return the item(s) according to the terms outlined below. View More

This Payment Policy outlines the terms and conditions governing all payments made for products purchased through our website. By making a purchase, you agree to be bound by this Payment Policy. View More

Installation Steps

Step1: Disconnect electrical power at breaker and allow the jacketed kettle to cool completely before service.

Step2: Remove control panel cover to access old thermostat assembly and label wires.

Step3: Carefully disconnect wiring and remove capillary sensing bulb from its well.

Step4: Install new thermostat, insert bulb into proper well position, and secure mounting hardware.

Step5: Reconnect wiring, reassemble panel, restore power, and test temperature calibration for safe operation.
