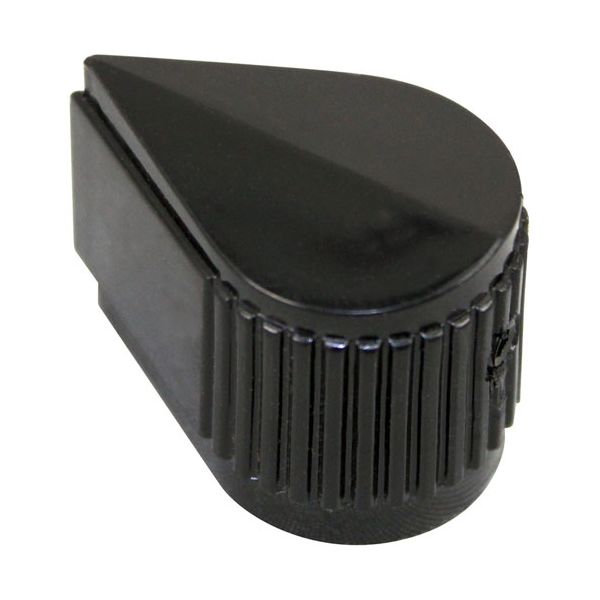
Frymaster 8100110 Fryer Thermostat Indicator Knob 1-3/8" DIA Mount 1/4"

Special Price $29.71 Regular Price $53.04
In stock
SKU
8100110
The Frymaster 8100110 Fryer Thermostat Indicator Knob 1-3/8" DIA Mount 1/4" Round enables the user to adjust the temperature on commercial appliances by simply turning the knob to the required setting. It also connects the thermostat shaft to the temperature control system to pass the user input. This knob is fitted in the front control panel of compatible fryers. It acts as an essential component of the control interface of the appliance, enabling the correct selection of temperature and stable operation of the fryer during regular operation.

Dimensions

  • Length: 1.325 In
  • Width: 0.75 In
  • Height: 1 In
  • Weight: 0.1 lbs
https://partsfe.com/media/catalog/product/f/r/frymaster-8100110-black-thermostat-indicator-knob-1-3-8-dia-mount-1-4-round-81835-2.jpg

Product Notes

  • Black T'Stat Indicator Knob ~
  • [ 1-3/8" Dia ] [ Pointer]
  • [Mount 1/4" Round] ~
  • 2 Set Screws Bottom & Right
  • Anets Fryer | Frymaster Fryer Units W/O Control Panel:
  • J1C, Mj15, Mj35, Mj40, Mj41, Mj45, Mj50, Mj235.
  • 1824/2424G, 1824E, 1824G, 18Ue, 2424E, 2424G, Cfd50, Cfd60,
  • Cfd80, D20, D50, D50G, D50Gdd, D60, D80, Eh1721, Fm35,
  • Fpd65, Fphd265, Fphd365, Fphd465, Fphd565, Fphd665, Hd150,
  • Hd260, Kfc18E, Mj35, Mj45, Pmj35, Scfd250G-Rti, Scfd50,
  • Scfd60, Scfd80, Scfhd160, Scfhd260, Scfhd360, Scfhd456,
  • Scfhd460, Scfhd60 | Imperial Ifsop
Write Your Own Review
You're reviewing:Frymaster 8100110 Fryer Thermostat Indicator Knob 1-3/8" DIA Mount 1/4"
Your Rating
Customer Questions
What maintenance is required for the Frymaster 8100110 Thermostat Indicator Knob?

Check that the knob aligns properly with the indicator marks. Clean off any grease buildup and ensure smooth rotation. Tighten the knob if it is loose on the control shaft.

What are the common issues with the Frymaster 8100110 Thermostat Indicator Knob?

  • Indicator misalignment with temperature settings.
  • Stiff or loose rotation.
  • Cracks or signs of wear.
  • Difficulty adjusting the appliance temperature accurately.

We strive to provide our customers with a hassle-free and efficient shopping experience. Our shipping policy ensures the timely delivery of your orders and complete customer satisfaction. View More

We are committed to ensuring your complete satisfaction with every purchase. We understand that circumstances may arise where you must return a product or request a refund. If for any reason you are not satisfied, you may return the item(s) according to the terms outlined below. View More

This Payment Policy outlines the terms and conditions governing all payments made for products purchased through our website. By making a purchase, you agree to be bound by this Payment Policy. View More

Installation Steps

Step1: Turn off and unplug the appliance to avoid burns or electrical hazards.

Step2: Remove the old knob by pulling it straight off the thermostat shaft.

Step3: Align the new knob with the shaft, ensuring the indicator marks match the thermostat settings.

Step4: Push the knob firmly onto the shaft until it clicks into place.

Step5: Test the knob rotation to confirm smooth operation and accurate temperature control.