Imperial 32209 Oven 60 Min Timer120V
Specifications:
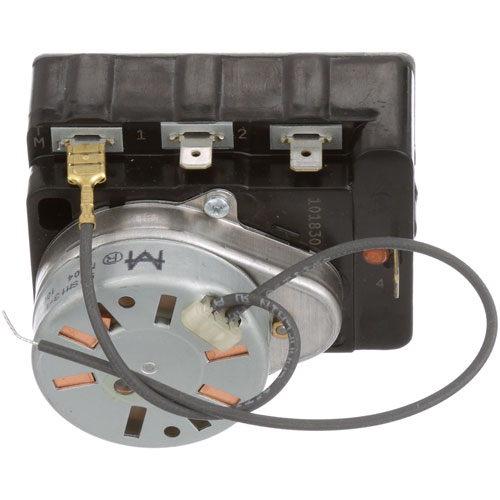
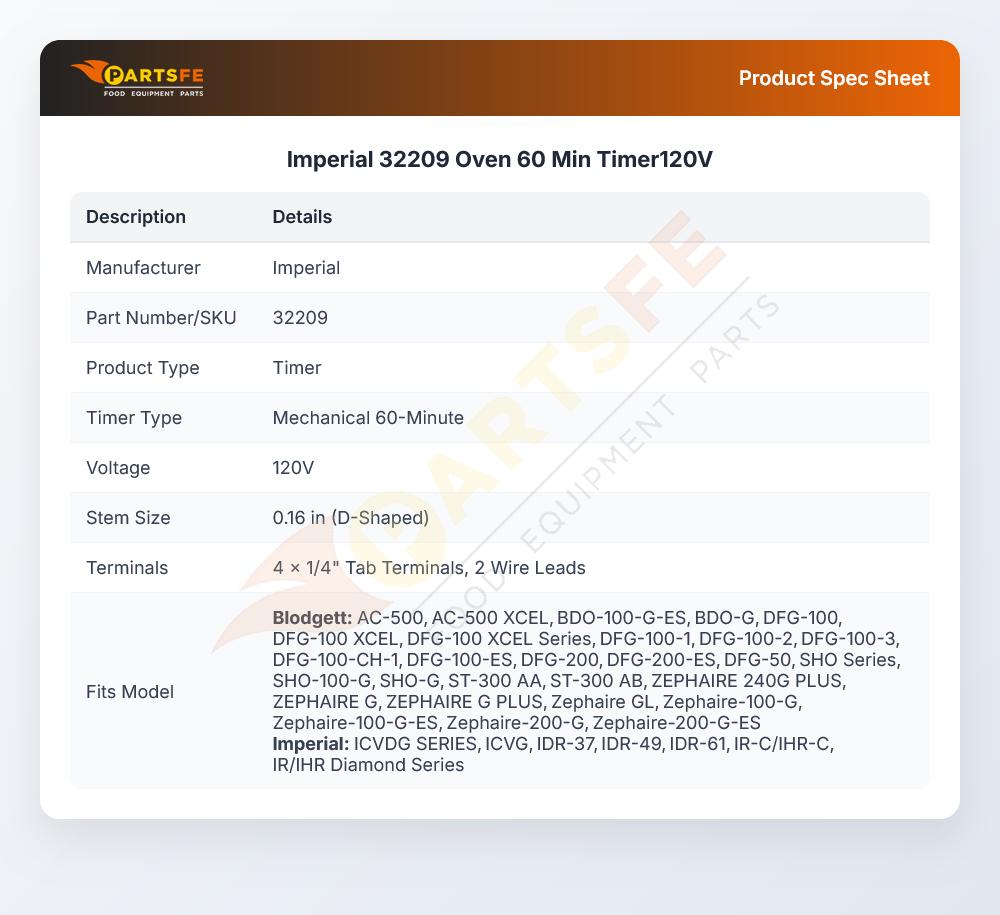
- Timer 120V, 60 Min, 4Ea. 1/4" Tab Terminals,
- 2 Wire Leads,
- .160" D-Stem
- Blodgett
- Oven Series: Dfg 50, Dfg 100, 200 & 300.
- After 7/86~
- Zephaire G With Solid State Controls.
- Shig.
Description
Dimensions:
- Weight: 0.8 lbs
- Length: 3.25 in
- Height: 3.5 in
- Width: 2.5 in
Step1: Turn off oven power at breaker and ensure circuit is fully isolated for safety.
Step2: Remove oven control panel and access timer wiring compartment carefully.
Step3: Note or label existing wiring connections before disconnecting.
Step4: Disconnect old timer and remove mounting screws securely.
Step5: Install new timer and align bracket correctly.
Step6: Reconnect wires per diagram, ensuring tight and safe terminals.
Step7: Reassemble panel, restore power, and test timer operation safely.
-
What maintenance is required for the Imperial 32209 Timer?
Keep the oven timer mechanism clean and free of grease buildup to ensure smooth operation. Inspect wiring connections periodically for wear or looseness to prevent malfunction. Avoid moisture exposure and ensure power is disconnected during servicing for safety.
-
What are common issues with the Imperial 32209 Timer?
- Timer fails to advance or stops mid-cycle.
- Inaccurate or inconsistent timing.
- Knob or dial becomes stiff or stuck.
- Electrical contact wear causing intermittent operation.
- Broken or loose timer shaft.
- Power fluctuations affecting timing accuracy.
Customer Reviews
No reviews yet. Be the first to write one!
Write a Review
We strive to provide our customers with a hassle-free and efficient shopping experience. Our shipping policy ensures the timely delivery of your orders and complete customer satisfaction. View More
We are committed to ensuring your complete satisfaction with every purchase. We understand that circumstances may arise where you must return a product or request a refund. If for any reason you are not satisfied, you may return the item(s) according to the terms outlined below. View More
This Payment Policy outlines the terms and conditions governing all payments made for products purchased through our website. By making a purchase, you agree to be bound by this Payment Policy. View More