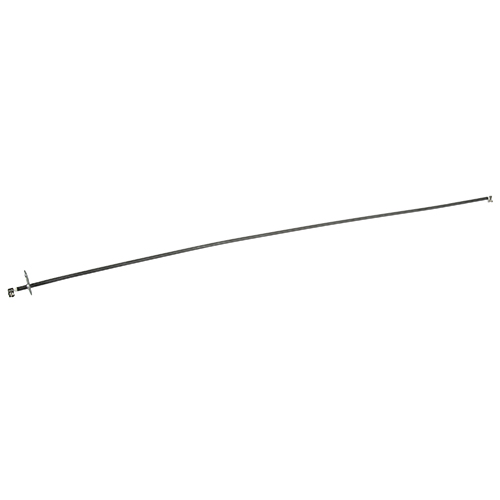
Hatco R02.08.107D.00 Food Warmer Element 950W 120V
Specifications:
- 120V 950W, 42" Warmer
- New Style .260" Dia.
- 37-1/2" From End Of Element To Mounting Bracket.
- To Replace Elements In Old Style Units, You Must Notch The
- End Plates To Accept The Larger Diameter New Style Elements.
- See Catalog For Old Style 3/16" Dia Elements If Needed.
- Hatco Warmer
Description
Dimensions:
- Weight: 0.5 lbs
- Length: 38.5 in
- Height: 0.75 in
- Width: 1.5 in
HATCO:
02-08-107 02-08-107-00 02-08-107D 02-08-107D-00 02.08.107 02.08.107.00 02.08.107D 02.08.107D.00 2-08-107 2-08-107D 2.08.107 2.08.107D HT02-08-107 HT02-08-107D HT02.08.107 HT02.08.107D HT2-08-107 HT2-08-107D HT2.08.107 HT2.08.107D HTR02-08-107 HTR02-08-107D HTR02-08-107D-00 HTR02-08-107D00 HTR02.08.107D HTR02.08.107D.00 HTR2-08-107D R02-08-107 R02-08-107-00 R02-08-107D R02-08-107D-00 R02-08-107D00 R02.08.107 R02.08.107.00 R02.08.107D R2-08-107D
Step1: Disconnect electrical power and allow the warmer unit to fully cool before servicing.
Step2: Remove the top cover or access panel to expose the heating element assembly.
Step3: Carefully detach the old element from mounting clips and electrical terminals.
Step4: Install the new element, ensuring proper alignment and secure, tight connections.
Step5: Verify correct fit for the element in the mounting brackets.
Step6: Restore power and test heating to confirm even, safe operation.
-
What maintenance is required for the Hatco R02.08.107D.00 Element?
Regularly clean the warmer element surface to remove grease and debris. Inspect electrical connections for tightness and signs of wear. Ensure proper mounting and avoid overheating during continuous operation. Disconnect power before servicing to prevent electrical shock.
-
What are common issues with the Hatco R02.08.107D.00 Element?
- Element burnout due to electrical overvoltage conditions.
- Loose electrical connections causing intermittent heating cycles.
- Corrosion or scaling buildup reducing overall efficiency.
- Uneven heating or persistent hot spots across element surface.
- Complete failure to heat or maintain temperature.
Customer Reviews
No reviews yet. Be the first to write one!
Write a Review
We strive to provide our customers with a hassle-free and efficient shopping experience. Our shipping policy ensures the timely delivery of your orders and complete customer satisfaction. View More
We are committed to ensuring your complete satisfaction with every purchase. We understand that circumstances may arise where you must return a product or request a refund. If for any reason you are not satisfied, you may return the item(s) according to the terms outlined below. View More
This Payment Policy outlines the terms and conditions governing all payments made for products purchased through our website. By making a purchase, you agree to be bound by this Payment Policy. View More