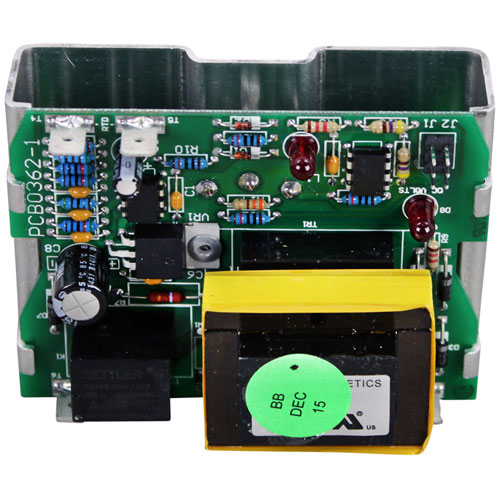

Southbend 1175025 Oven Control Board W/ Potentiometer & Bracket
Specifications:
- Control Board W/ Potentiometer & Bracket
- Pot Has 1/4" Round Stem
- 8Ea 1/4" Tab Terminals
- Pointer Dial To Use A2644, # 22-1255
- Southbend "Cook Only"
- Oven Series: Eb, Es, Gb, Gs, Sleb, Sles, Slgb, Slgs.
- *All Units Must Have "Sc" (Standard Control) Suffix.
- For Temp Probe Use # 44-1220
Description
Dimensions:
- Weight: 0.49 lbs
- Length: 3.5 in
- Height: 3 in
- Width: 2.5 in
Step1: Turn off the oven and disconnect it from power to prevent electric shock.
Step2: Remove the control panel cover to access the existing control board.
Step3: Label and disconnect all wires from the old board.
Step4: Unscrew and remove the old unit, then mount the new board with the bracket.
Step5: Reconnect wires to matching terminals and secure connections.
Step6: Reassemble the panel, restore power, and test oven operation.
-
What maintenance is required for the Southbend 1175025 Control Board?
Keep the control board clean and free from dust or grease. Inspect wiring connections regularly. Avoid exposure to moisture. Handle carefully to prevent damage to sensitive electronic components.
-
What are common issues with the Southbend 1175025 Control Board?
- Control board is not responding properly.
- Display or input malperformances.
- Intermittent operation due to wiring issues.
- Overheating is causing a shutdown.
- Component failure affecting oven performance.
Customer Reviews
Write a Review
-
Seamless Integration
Excellent control, operates seamlessly all day
We strive to provide our customers with a hassle-free and efficient shopping experience. Our shipping policy ensures the timely delivery of your orders and complete customer satisfaction. View More
We are committed to ensuring your complete satisfaction with every purchase. We understand that circumstances may arise where you must return a product or request a refund. If for any reason you are not satisfied, you may return the item(s) according to the terms outlined below. View More
This Payment Policy outlines the terms and conditions governing all payments made for products purchased through our website. By making a purchase, you agree to be bound by this Payment Policy. View More