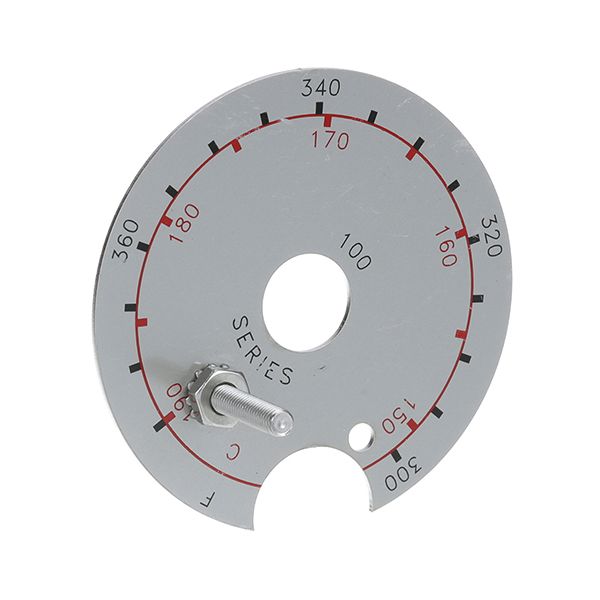
Frymaster 806-0087SP Fryer Thermostat Dial Plate

Special Price $36.71 Regular Price $65.56
In stock
SKU
806-0087SP
The Frymaster 806-0087SP Thermostat Dial Plate helps keep your fryer running at the right temperature and exact design. The plate is made from strong materials that stand up to heat and show simple temperature markers, both helping you work better and faster. When you're cooking in a fast-paced kitchen, this dial plate helps you fry food perfectly, stopping you from making mistakes that can give you undercooked or burnt food. You can set it up quickly and keep it working well, which helps keep your fryer running longer. When we manage temperature well, our kitchen runs more efficiently while using less oil and making better food.

Dimensions

  • Length: 3 In
  • Width: 3 In
  • Height: 1 In
  • Weight: 0.1 lbs
https://partsfe.com/media/catalog/product/f/r/frymaster-806-0087sp-fryer-thermostat-dial-plate-99242-2.jpg

Product Notes

  • T'Stat Dial Plate, 300-375
  • Frymaster Fryer Fm35, Mj35, Mj45, Pmj35
Write Your Own Review
You're reviewing:Frymaster 806-0087SP Fryer Thermostat Dial Plate
Your Rating
Customer Questions
What maintenance is required for the Frymaster 806-0087SP Thermostat Dial Plate?

Regularly inspect thermostat dial plate for damage, fading markings, or looseness to ensure accurate temperature settings. Clean gently with non-abrasive cloth to avoid damaging calibration markings. Ensure secure mounting to prevent misalignment affecting fryer temperature control.

What are common issues with the Frymaster 806-0087SP Thermostat Dial Plate?

  • Faded or unreadable dial markings causing incorrect temperature settings.
  • Loose or misaligned dial plate affecting thermostat adjustment accuracy.
  • Dirt buildup behind plate reducing smooth dial movement.
  • Cracked or worn plate leading to unstable control readings.

We strive to provide our customers with a hassle-free and efficient shopping experience. Our shipping policy ensures the timely delivery of your orders and complete customer satisfaction. View More

We are committed to ensuring your complete satisfaction with every purchase. We understand that circumstances may arise where you must return a product or request a refund. If for any reason you are not satisfied, you may return the item(s) according to the terms outlined below. View More

This Payment Policy outlines the terms and conditions governing all payments made for products purchased through our website. By making a purchase, you agree to be bound by this Payment Policy. View More

Installation Steps

Step1: Switch off power and allow fryer to cool completely to avoid burns and disconnect gas supply if applicable.

Step2: Remove control knob and unscrew existing dial plate carefully noting alignment before proceeding.

Step3: Position new dial plate over thermostat stem aligning markings correctly for correct calibration.

Step4: Secure with screws and reattach knob firmly ensuring smooth rotation and avoid over-tightening.

Step5: Restore power and test temperature settings for proper operation and verify accuracy.