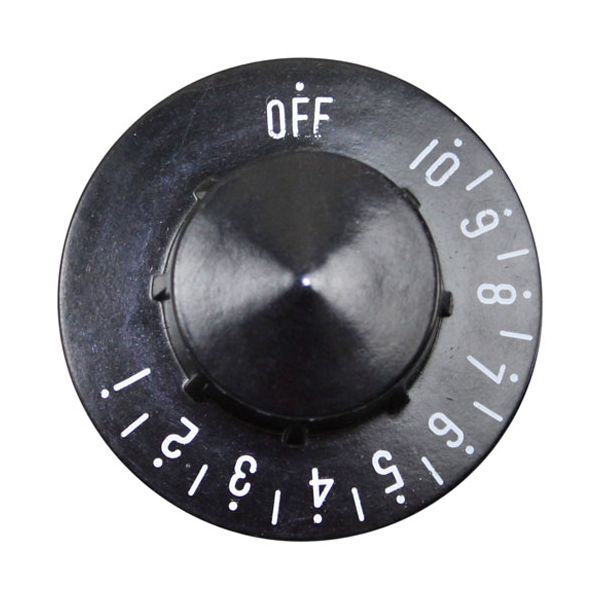
Groen 012314 Jacketed Kettle Thermostat Knob 2-1/4" DIA

$15.30
In stock
SKU
012314
The Groen 012314 Jacketed Kettle Thermostat Knob 2-1/4" DIA is a control part that can be used to replace, which allows the user to adjust cooking temperatures more accurately. It is 2-1/4" in diameter and provides an interface to user needs to control heating levels in foodservice surroundings, including institutional kitchens, cafeterias, and production facilities. The knob is installed on the thermostat shaft of the kettle and is involved in the control of the amount of heat added, which allows the cooking of soups and sauces.

Dimensions

  • Length: 2.25 In
  • Width: 2.25 In
  • Height: 0.75 In
  • Weight: 0.1 lbs
https://partsfe.com/media/catalog/product/g/r/groen-012314-thermostat-infinite-switch-knob-2-1-4-dia-59947-2.jpg

Product Notes

  • T'Stat/Infinite Switch Knob, Black W/White Print.
  • [ 2-1/4" Dia ] [ Off-10-1] [Mount .187] [ Flat Down ]
  • Atlas Warmer Wih-D, Wih-M4.
  • Cecilware
  • Delfield
  • Groen Kettle Series: Ae, Ah, Cah, Dcae, Dcee, Dh, Ee, Em,
  • Hh, Tdb.
  • Prince Castle Toaster 197, 297
  • Savory Toaster Series C-20, C-40
  • Seco Warmer Steam Table Where Applicable.
  • Vulcan Kettle El, Es, Et
ATLAS METAL:
CECILWARE:
DELFIELD:
GRINDMASTER:
METAL MASTERS:
PIPER PRODUCTS:
PRINCE CASTLE:
SECO:
Write Your Own Review
You're reviewing:Groen 012314 Jacketed Kettle Thermostat Knob 2-1/4" DIA
Your Rating
Customer Questions
What maintenance is required for the Groen 012314 Thermostat Knob?

Clean the knob frequently to remove grease and grime that can affect grip and visibility. Inspect for cracks or loosening on the shaft connection. Avoid over-tightening or forceful turning to prevent damage and ensure smooth control operation.

What are common issues with the Groen 012314 Thermostat Knob?

  • Cracked or broken knob housing from impact.
  • Loose fit causing slipping on control shaft.
  • Worn or faded temperature markings.
  • Stiff rotation due to grease or debris buildup.
  • Misalignment affecting accurate heat adjustment.

We strive to provide our customers with a hassle-free and efficient shopping experience. Our shipping policy ensures the timely delivery of your orders and complete customer satisfaction. View More

We are committed to ensuring your complete satisfaction with every purchase. We understand that circumstances may arise where you must return a product or request a refund. If for any reason you are not satisfied, you may return the item(s) according to the terms outlined below. View More

This Payment Policy outlines the terms and conditions governing all payments made for products purchased through our website. By making a purchase, you agree to be bound by this Payment Policy. View More

Installation Steps

Step1: Switch off equipment power, unplug or isolate electrical supply, and ensure surface is cool for safety.

Step2: Carefully pull off existing knob from the control shaft without applying excessive force.

Step3: Align replacement knob with thermostat/infinite switch shaft, matching flat or keyed position.

Step4: Push knob firmly onto shaft until fully seated and securely attached.

Step5: Restore power, then test smooth rotation and temperature or power control operationality.