
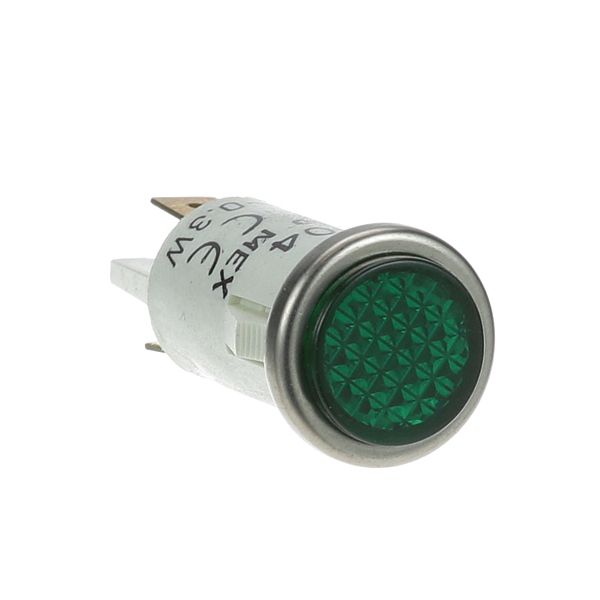
Hatco 02.19.155 Green Signal Light 1/2" 125V

$8.10
In stock
SKU
02.19.155
Manufacturer:

The Hatco 02.19.155 Green Signal Light is a visual indicator that is used to show the amount of electrical current in a 125V circuit. The internal lamp switches when power is applied, and it gives an on/off position using the green lens. It is normally attached to the control panels or equipment casing by a 1/2-inch hole. The assembly consists of a green lens, housing and electrical terminals that are standard wiring connections. The small part allows installation and replacement.

Dimensions

  • Length: 1.25 In
  • Width: 0.625 In
  • Height: 0.625 In
  • Weight: 0.1 lbs
https://partsfe.com/media/catalog/product/h/a/hatco-02-19-155-signal-light-1-2-green-125v-33748-2.jpg

Product Notes

  • Signal Light, 125V, Green, 1/2", Flat, 3/16" Tabs
  • Bloomfield
  • Coffee 8516, 8518, 8540, 8541, 8572, 8573, 8574,
  • 8716, 8718, 8740, 8741, 8742, 8746, 8751, 8752,
  • 8753, 8754, 8755, 8756, 8757, 8758, 8781A, 9010,
  • 9011, 9012, 9013, 9016, 9017, 9102, 9104.
STERO:
STA2J-72671, STA2J72671
VOLLRATH:
8043-31A, 8718-31, VOL8043-31A, VOL8718-31
VULCAN HART:
Write Your Own Review
You're reviewing:Hatco 02.19.155 Green Signal Light 1/2" 125V
Your Rating
Customer Questions
What maintenance is required for the Hatco 02.19.155 Signal Light?

Inspect the signal light regularly to ensure proper illumination and secure electrical connections. Clean the lens to remove grease or dust that can reduce visibility.

What are common issues with the Hatco 02.19.155 Signal Light?

  • Light not illuminating due to electrical failure.
  • Flickering or intermittent operation.
  • Cloudy or dirty lens reducing visibility.
  • Loose wiring causing inconsistent performance.
  • Burned-out indicator lamp.

We strive to provide our customers with a hassle-free and efficient shopping experience. Our shipping policy ensures the timely delivery of your orders and complete customer satisfaction. View More

We are committed to ensuring your complete satisfaction with every purchase. We understand that circumstances may arise where you must return a product or request a refund. If for any reason you are not satisfied, you may return the item(s) according to the terms outlined below. View More

This Payment Policy outlines the terms and conditions governing all payments made for products purchased through our website. By making a purchase, you agree to be bound by this Payment Policy. View More

Installation Steps

Step1: Turn off power supply to avoid electrical shock.

Step2: Confirm panel hole fits indicator light size.

Step3: Insert the signal light into the panel opening securely.

Step4: Tighten mounting nut from the rear to hold it in place.

Step5: Connect wires to correct terminals.

Step6: Restore power and test light operation.

Step7: Ensure all connections are insulated and secure before use.