
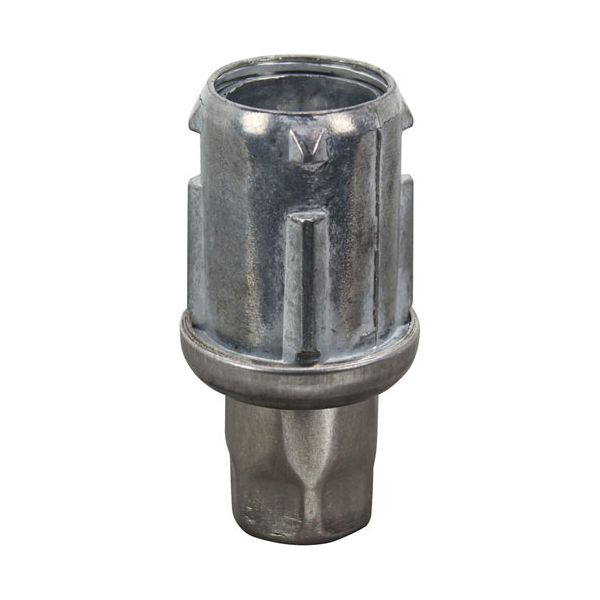
Standard Keil 1010-0801-1144 Bullet Foot Stainless Steel 1-1/2" H X 1-3/8" D

$7.12
In stock
SKU
1010-0801-1144
Manufacturer:

The Standard Keil 1010-0801-1144 Bullet Foot Stainless Steel 1-1/2" H X 1-3/8" D supports equipment with a fixed contact point which threads or clamps into an appropriate base. The circular profile spreads the load vertically, and the hollow basis enables the positioning by tightening with the standard tools. It is commonly mounted on the bottom of equipment legs, frames or stands where they have to touch the floor and provide height and stability. The dimensions are 1-1/2 inches high and 1-3/8 inches in diameter, which can be fitted with the corresponding mounts.

Dimensions

  • Length: 3.25 In
  • Width: 1.5 In
  • Height: 1.5 In
  • Weight: 0.44 lbs
https://partsfe.com/media/catalog/product/s/t/standard-keil-1010-0801-1144-polished-stainless-steel-bullet-foot-with-hex-base-1-1-2h-x-1-3-8-d-24981-2.jpg

Product Notes

  • Bullet Foot
  • Fits 1-5/8" Od Tubing
  • Stainless Steel
  • Hex Foot,
  • 1-1/2"H [ Stud 1-3/8" D ]
  • [Polished ], Adj: 1-1/2" > 2-3/4"
  • Garland Broiler
  • Imperial Series: Ifs, Irfs, Series: Icra, Icv, Icvd, Idr,
  • Isp
AMERICAN RANGE:
-A35000, A35000
CHG:
-A10-0851-C, A10-0851, A10-0851-C, A10-0851C, CHGA10-0851, CHGA10-0851-C, CHGA10-0851C
GARLAND:
IMPERIAL:
-1045, 1045, IMP1045
STANDARD KEIL:
Write Your Own Review
You're reviewing:Standard Keil 1010-0801-1144 Bullet Foot Stainless Steel 1-1/2" H X 1-3/8" D
Your Rating
Customer Questions
What maintenance is required for the Standard Keil 1010-0801-1144 Bullet Foot?

Regularly clean the foot surface with a mild detergent and soft cloth to prevent buildup and corrosion. Inspect the hex base for secure fitting and tighten if needed. Avoid abrasive cleaners to maintain the polished finish. Periodically check for wear or loosening to ensure stable support.

What are common issues with the Standard Keil 1010-0801-1144 Bullet Foot?

  • Loosening of the hex base over time.
  • Surface scratches or dulling of polished finish.
  • Corrosion from exposure to harsh chemicals.
  • Instability due to uneven mounting surfaces.

We strive to provide our customers with a hassle-free and efficient shopping experience. Our shipping policy ensures the timely delivery of your orders and complete customer satisfaction. View More

We are committed to ensuring your complete satisfaction with every purchase. We understand that circumstances may arise where you must return a product or request a refund. If for any reason you are not satisfied, you may return the item(s) according to the terms outlined below. View More

This Payment Policy outlines the terms and conditions governing all payments made for products purchased through our website. By making a purchase, you agree to be bound by this Payment Policy. View More

Installation Steps

Step1: Shut down equipment and ensure load is fully supported before installation begins.

Step2: Thread bullet foot into mounting point, ensuring proper alignment with the hex base.

Step3: Adjust height to level machinery evenly and check for wobble during setup.

Step4: Tighten securely with a wrench; avoid over-torquing to secure thread or base damage.

Step5: Inspect stability and check load distribution before use; recheck after initial operation.