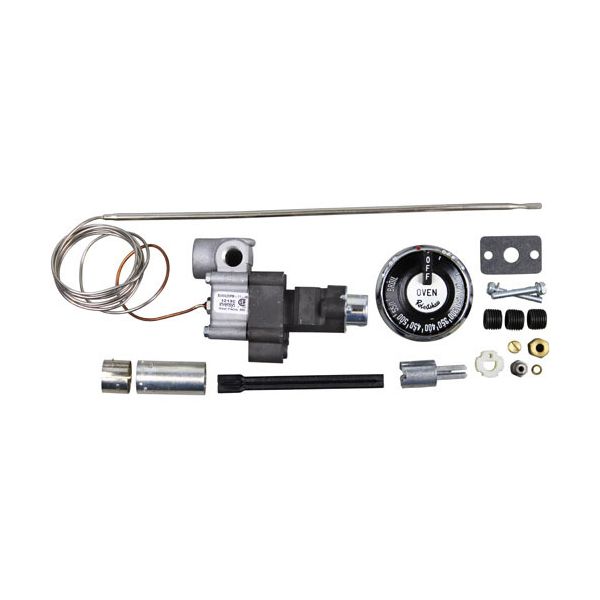
Franklin Chef 147912 Thermostat BJWA , 3/16 X 11-5/8, Cap 48"
Special Price $180.10 Regular Price $277.50
In stock
SKU
147912
Manufacturer:

Thermostat W/Dial Bjwa, 3/16 X 11-5/8, 48
Dimensions
- Length: 13.75 In
- Width: 4.25 In
- Height: 3.5 In
- Weight: 1.3 lbs
Product Notes
- Viewed From Rear:See Addl Image "Outlet Positions"
- [ Bjwa Kit W/ 3/16" Cct Pilot [ Temp 250-550 ] [ Bulb
- 3/16" X 11-5/8" ] [ Cap 48" ] [ Out 1/4" Fpt "A,B,C,D,"]
- [ Rotation 0 Degrees ] [ Includes Dial & Bezel, Stem
- Adapters, Gasket, Screws ] Wide Flange.
- Black Dial W/ Adapter = # 22-1028 ]
- Franklin Chef Oven Gr(10,11,12,13,14,16-0,17,22,
- 410,415,416,426).
- Series: Gra & Grax & Grc With S/N 1000000 To 1008568
- &1017255 & After.
- Montague Chinese Bbq Oven 28Cbsf, Montague Ii "R".
- Us Range Oven Series Performer Ii
- Vulcan/Wolf Oven Series: 59, 64.(70 After 11/74).