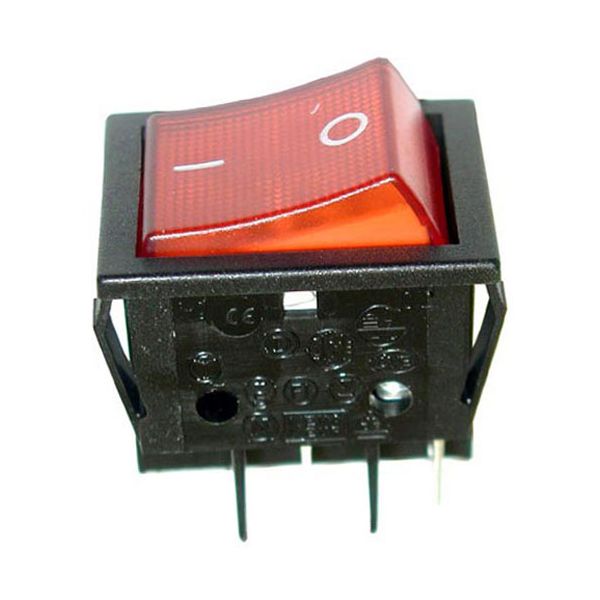
Holman 2E-Z10942 Rocker Switch

Special Price $50.85 Regular Price $60.54
In stock
SKU
2E-Z10942
Manufacturer:
The Holman 2E-Z10942 Rocker Switch closes or opens electric current when the rocker is pressed, and the internal contacts are designed to either open or close the current in a single circuit. The rocker will activate or deactivate the switch mechanism to have on/off control by one actuator. It is mounted in the control panel of compatible equipment, mounted with a panel cutout having terminals that can be wired. The design of the switch is such that it fits the required hole sizes and therefore fits well in the panel, and provides operator access to the switch to facilitate normal operation.

Dimensions

  • Length: 1.2 In
  • Width: 1 In
  • Height: 1.5 In
  • Weight: 0.1 lbs
https://partsfe.com/media/catalog/product/h/o/holman-2e-z10942-rocker-switch-53054-2.jpg

Product Notes

  • Lighted Rocker Switch, Kema/Keur, Rocker, 15/16" X 1-1/8",
  • Dpst, On/Off, 20A-125V, 16A/250V, 4Ea (1/4" Tabs),
  • Red Light/Black Bezel
  • Star Warmer Sst- 20,30,50
  • Griddle 824, 836, 848, 860, 872, (Ts, Tschs)
  • Star Roller Grill: 20, 30, 30D, 45A, 50, 75A.
Write Your Own Review
You're reviewing:Holman 2E-Z10942 Rocker Switch
Your Rating
Customer Questions
What maintenance is required for the Holman 2E-Z10942 Rocker Switch?

Inspect the rocker switch regularly for looseness, damage, or signs of electrical arcing. Keep the switch surface clean and free from grease or dust buildup. Ensure wiring connections remain tight and secure to maintain consistent electrical contact and better operation.

What are common issues with the Holman 2E-Z10942 Rocker Switch?

  • Intermittent power loss due to worn internal contacts.
  • Switch sticking or failing to toggle properly.
  • Loose wiring causing inconsistent operation.
  • Burn marks or overheating from electrical overload.
  • Complete failure preventing circuit activation.

We strive to provide our customers with a hassle-free and efficient shopping experience. Our shipping policy ensures the timely delivery of your orders and complete customer satisfaction. View More

We are committed to ensuring your complete satisfaction with every purchase. We understand that circumstances may arise where you must return a product or request a refund. If for any reason you are not satisfied, you may return the item(s) according to the terms outlined below. View More

This Payment Policy outlines the terms and conditions governing all payments made for products purchased through our website. By making a purchase, you agree to be bound by this Payment Policy. View More

Installation Steps

Step1: Turn off power and confirm the unit is fully disconnected before starting.

Step2: Remove control panel cover and gently disconnect existing rocker switch terminals.

Step3: Press new rocker switch into mounting cutout until it snaps securely into place.

Step4: Reattach wires to matching terminals ensuring firm and correct connections.

Step5: Reinstall panel restore power and test switch for smooth operation safely.