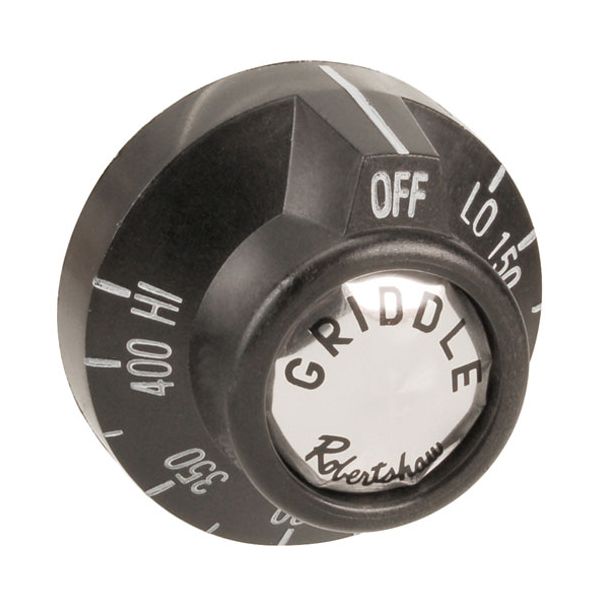
Star Mfg 2R9499 Thermostat Knob BJ 150-400°F

$22.97
In stock
SKU
2R9499
The Star Mfg 2R9499 Thermostat Knob BJ controls the temperature using a dial that adjusts the internal control mechanism, which is set to 150°-400°F. The dial is turned to adjust the heat level chosen. This is mounted on the control panel, and it is directly linked to the shaft to be adjusted by the operator. It has a four-way pattern that is compatible with other models to install. The identified temperature range is enabled when cooking and when adjusting the equipment.

Dimensions

  • Length: 2 In
  • Width: 2 In
  • Height: 1.25 In
  • Weight: 0.25 lbs
https://partsfe.com/media/catalog/product/s/t/star-mfg-2r9499-4-way-mounting-thermostat-dial-150-400-f-griddle-88747-2.jpg

Product Notes

  • Thermostat Dial Fits Robertshaw Bjwa Thermostats Universal
  • 4-Way Mounting
  • Includes: Indin Stem Adaptor
  • Temp Range: 150 To 400 F Griddle
  • Type: Universal 4-Way Mounting Fahrenheit Only Dial
  • Weight: 0.099 Lb
  • Models Used In:
  • Jade Jggt-2424, Jggt-2436, Jggt-2448, Jggt-2460, Jggt-2472,
  • Jggt-2484, Jgt-2424, Jgt-2436, Jgt-2448, Jgt-2460, Jgt-2472,
  • Jgt-2484, Jsr-12G-4-36, Jsr-48Gt-36
  • Toastswell 615T, 624T
  • Wolf Ch, Chr, Chss, C23, F, Fs, Gg, Kch, Kchss, Pro-Tg-24,
  • Pro-Tg-60A-F, Rtg-36-C, Rtg-48, Stg-48, Stg-72, Xf, Xs
  • Us Range C0836-18, Rgta-2424-1, Rgta-2436-1, Rgta-2448-1,
CECILWARE:
DELFIELD:
-1106, 1106, DEL1106
GARLAND:
-1224504, -224000, 1224504, 224000
GRINDMASTER:
-M044A, -M044F
JADE RANGE:
-300-157-000, 300-157-000
SOUTHBEND:
-1173645, 1173645, SOU1173645
STAR MFG:
-2R-9499, -9499, 2R-9499, 2R9499, 9499
US RANGE - SEE GARLAND:
VULCAN HART:
-00-719408, -19408, -719408
Write Your Own Review
You're reviewing:Star Mfg 2R9499 Thermostat Knob BJ 150-400°F
Your Rating
Customer Questions
No Questions

We strive to provide our customers with a hassle-free and efficient shopping experience. Our shipping policy ensures the timely delivery of your orders and complete customer satisfaction. View More

We are committed to ensuring your complete satisfaction with every purchase. We understand that circumstances may arise where you must return a product or request a refund. If for any reason you are not satisfied, you may return the item(s) according to the terms outlined below. View More

This Payment Policy outlines the terms and conditions governing all payments made for products purchased through our website. By making a purchase, you agree to be bound by this Payment Policy. View More

Installation Steps

Step1: Turn off equipment power and allow the unit to cool completely.

Step2: Remove the existing thermostat dial from the control shaft.

Step3: Clean the shaft and mounting area before installation.

Step4: Align the new dial with the thermostat shaft correctly.

Step5: Press the dial into place and secure it firmly.

Step6: Test temperature adjustment to confirm proper control operation.