
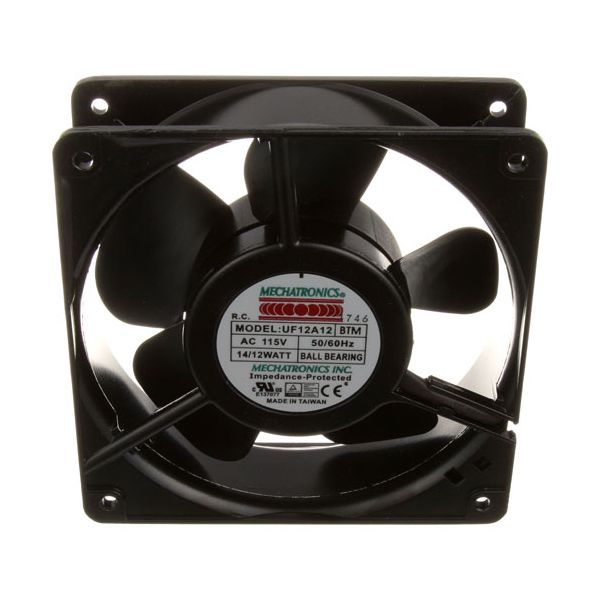
Holman 2U-200559 Conveyor Toaster Axial Cooling Fan 92 CFM 2750 RPM 120V

Special Price $119.69 Regular Price $184.42
In stock
SKU
2U-200559
Manufacturer:

The Holman 2U-200559 Conveyor Toaster Axial Cooling Fan 92 CFM 2750 RPM 120V pushes air into the toaster cavity by rotating the fan blades with the application of electrical power. It pulls air over the heating elements, or the cooking chamber and forces it through the vents to aid in airflow. This fan motor is the air circulation of the oven, usually at the back or top of the cooking cavity, which has a ball-bearing construction, and works. It is applied as an alternative to the damaged fan to sustain airflow during regular toasting cycles.

Dimensions

  • Length: 4.7 In
  • Width: 4.7 In
  • Height: 1.5 In
  • Weight: 1.13 lbs
https://partsfe.com/media/catalog/product/h/o/holman-2u-200559-120v-axial-fan-92-cfm-2750-rpm-ball-bearing-90982-2.jpg

Product Notes

  • Axial Fan, 120V 50/60Hz, 14 Watt, 2750Rpm, 92Cfm, Ball
  • Bearing, Mechatronics, 4-11/16" X 4-11/16" X 1-1/2"
  • Wide, 4-1/8" Mt Ctrs, For Cord W/Plug Use # 38-1356
  • Belleco Toaster
  • Holman 210Hx, 214Hx, 526Woa, Ft1W, Ft2W, Qcs-2-300H,
  • Qcs-2-500, Rcs-2-500, Tt300H, Tt450,
  • Star Csd-2(H, Nhc, Rcch, Rch), Hpd(1, 1Arb, 2, E1, E2),
  • Spd1(Arb, Hp)
Write Your Own Review
You're reviewing:Holman 2U-200559 Conveyor Toaster Axial Cooling Fan 92 CFM 2750 RPM 120V
Your Rating
Customer Questions
What maintenance is required for the Holman 2U-200559 Axial Fan?

Regularly clean dust and debris from blades and housing to maintain airflow efficiency. Inspect ball bearings for wear and ensure proper lubrication if required. Check electrical connections and mounting stability to prevent vibration and overheating during operation.

What are common issues with the Holman 2U-200559 Axial Fan?

  • Reduced airflow from dust buildup.
  • Bearing wear causing noise.
  • Motor overheating or failure.
  • Electrical connection intermittency.
  • Excess vibration or imbalance.
  • Reduced cooling performance under load.
  • Unusual rattling or humming sounds.

We strive to provide our customers with a hassle-free and efficient shopping experience. Our shipping policy ensures the timely delivery of your orders and complete customer satisfaction. View More

We are committed to ensuring your complete satisfaction with every purchase. We understand that circumstances may arise where you must return a product or request a refund. If for any reason you are not satisfied, you may return the item(s) according to the terms outlined below. View More

This Payment Policy outlines the terms and conditions governing all payments made for products purchased through our website. By making a purchase, you agree to be bound by this Payment Policy. View More

Installation Steps

Step1: Disconnect power and ensure the equipment is fully cooled and locked out before service.

Step2: Remove the rear or side access panel to reach the existing fan assembly.

Step3: Label and disconnect the wiring harness from the old fan motor.

Step4: Unscrew mounting fasteners and remove the faulty axial fan.

Step5: Position the new fan in the same airflow direction and secure it to the mounting points.

Step6: Reconnect wiring firmly, ensuring correct polarity and no exposed conductors.

Step7: Restore power and verify smooth fan operation and proper cooling airflow during a test cycle.