
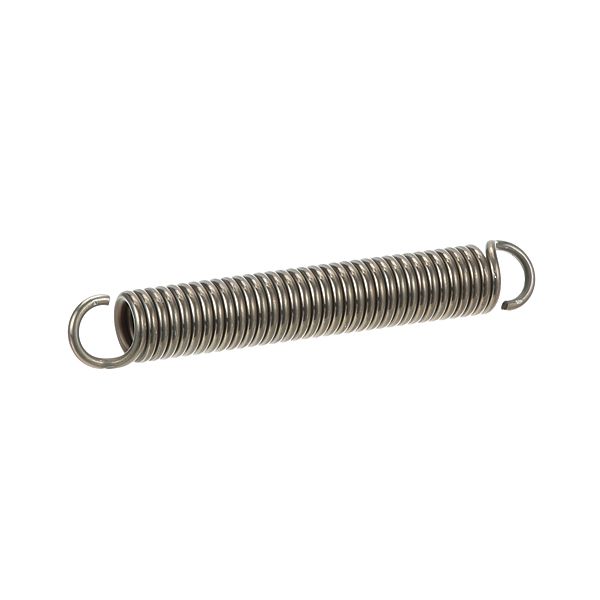
Hobart 413342-1 Door Spring W/34 Coils 6"

Special Price $59.40 Regular Price $77.14
In stock
SKU
413342-1
Manufacturer:

The Hobart 413342-1 Door Spring is a counterbalance to the movement of the oven doors by compressing and extending the 34-coil body. It functions to counteract the weight of the door and make it open and close in a controlled manner. This spring is attached to the hinge assembly of compatible equipment and fastened at the specified points of attachment. It has a length of 6 inches to fit the door design and the tension. The coil design enables the repetitive use of the coil by applying a constant force to the coil.

Dimensions

  • Length: 6 In
  • Width: 1 In
  • Height: 1 In
  • Weight: 0.31 lbs
https://partsfe.com/media/catalog/product/h/o/hobart-413342-1-6-oven-door-spring-with-34-coils-54206-2.jpg

Product Notes

  • Door Spring, Total Length 6",
  • 34 Coils, Spring Coil 4.659" Long,
  • Hooks Face Opposite Direction.
  • Original Had Red Paint On It.
  • Vulcan
  • Oven 36(L,Lc), 60L, 260L, 148(L,Lc), 160(L,Lc), 481(L,Lc).
  • Eg36/60/160/260.
  • Series: 77, Sg77, 141, 241, Series Vg
  • 319A-77R, 399A-77R, E-36, E-60
Write Your Own Review
You're reviewing:Hobart 413342-1 Door Spring W/34 Coils 6"
Your Rating
Customer Questions
What maintenance is required for the Hobart 413342-1 Door Spring?

Check spring tension regularly to ensure proper door balance. Inspect for stretching or deformation that affects door closure. Keep hinges clean and free from grease buildup. Ensure secure mounting points to maintain secure and controlled oven door movement.

What are common issues with the Hobart 413342-1 Door Spring?

  • Loss of tension causing heavy door drop.
  • Spring stretching over repeated use.
  • Noise during door opening or closing.
  • Uneven door alignment.

We strive to provide our customers with a hassle-free and efficient shopping experience. Our shipping policy ensures the timely delivery of your orders and complete customer satisfaction. View More

We are committed to ensuring your complete satisfaction with every purchase. We understand that circumstances may arise where you must return a product or request a refund. If for any reason you are not satisfied, you may return the item(s) according to the terms outlined below. View More

This Payment Policy outlines the terms and conditions governing all payments made for products purchased through our website. By making a purchase, you agree to be bound by this Payment Policy. View More

Installation Steps

Step1: Disconnect oven from power at the breaker and ensure it is completely cool.

Step2: Open door fully and support it securely to avoid sudden drop.

Step3: Remove old spring using proper tool carefully.

Step4: Attach new spring to mounting hooks, ensuring correct coil orientation and tension alignment.

Step5: Test door tension and smooth movement before use.

Step6: Reassemble components and restore power at breaker.