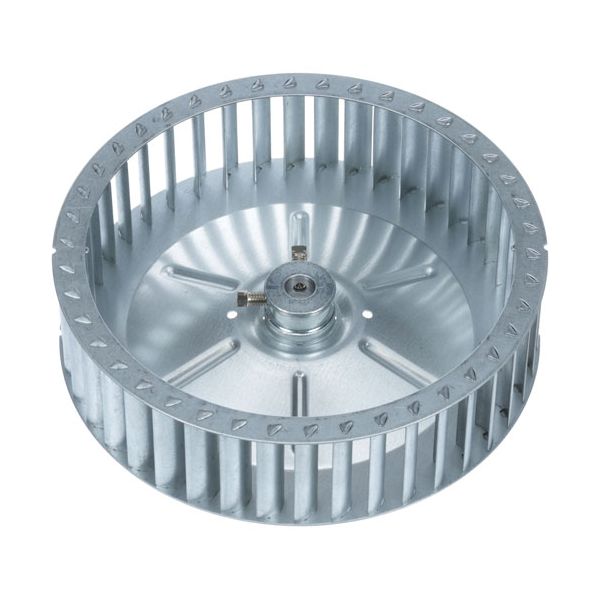
Hobart 415780-00003 Convection Oven Blower Wheel 9-7/8" DIA X 2-5/8" W 5/8" Bore
Special Price $98.40 Regular Price $151.62
In stock
SKU
415780-00003
Manufacturer:

The Hobart 415780-00003 Convection Oven Blower Wheel works by rotating to force the air into the system and direct it out through the curved blades to ensure that there is an even flow of air. The balanced wheel structure assists in even movement of air when it rotates on the motor shaft, when the equipment is in operation. It is a component that is fitted within the blower frame, and it is attached to the motor shaft in compatible foodservice equipment. It is designed to fit and match certain airflow and fit needs with a 9-7/8" diameter, 2-5/8" width, and a 5/8" bore. Its design helps in the circulation of air during active cycles.
Dimensions
- Length: 9.875 In
- Width: 2.625 In
- Height: 9.875 In
- Weight: 2.6 lbs
Product Notes
- Blower Wheel,
- [ 9-7/8" Dia ] X [2-5/8"W] 5/8" Bore, Concave Back,
- Cw Rotation, Smooth Hub, 1 Set Screw.
- Vulcan Motor 120/208/240V 1Ph, # 68-1008 Or
- # 68-1275 ( Either Will Work)
- Wolf & Vulcan 2 Speed 115V Motor # 68-1038
- Vulcan Oven Et,(Not Et4}, Gt,Roe,Sg,Vc
- Wolf Oven Wkgd