

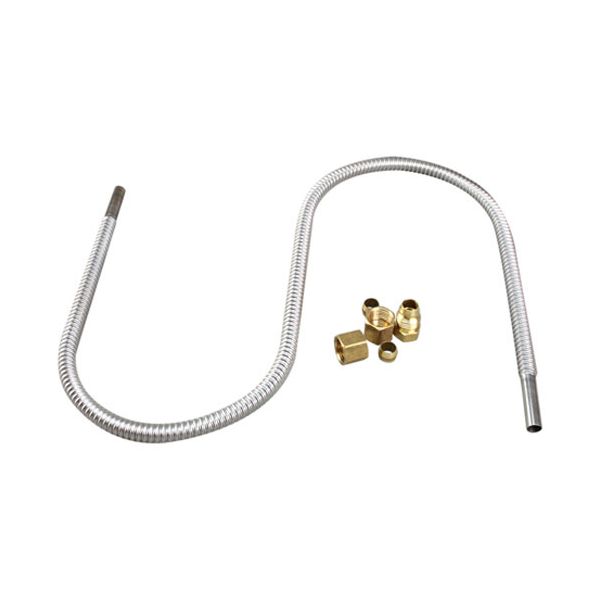
Vulcan Hart 417389-1 Flex Tube Kit 1/4" X 24" Stainless Steel

Special Price $37.55 Regular Price $53.64
In stock
SKU
417389-1
The Vulcan Hart 417389-1 Flex Tube Kit 1/4" X 24" moves gas or fluid through a flexible stainless steel tube that allows the movement and alignment deviation of the system. It works by keeping a closed-line passage in between connection points, and it can bend a bit without limiting flow. The kit is fitted with in-built fittings that can be used to fit into compatible ports. The flex tube can be used as a connection between fixed gas or fluid lines and the connected components and can be anywhere in the internal layout of the equipment.

Dimensions

  • Length: 24 In
  • Width: 0.25 In
  • Height: 0.5 In
  • Weight: 0.15 lbs
https://partsfe.com/media/catalog/product/v/u/vulcan-hart-417389-1-1-4-stainless-steel-flex-tube-kit-with-fittings-60986-2.jpg

Product Notes

  • Corrugated Stainless Steel Flex Tube Kit,
  • For Gas Supply And Pilot Lines.
  • Includes:
  • 1 Flex Tube, 1/4" X 24"
  • 2 Compression Nuts
  • 2 Compression Sleeves (Ferrules)
  • 1 Male Breakaway Fitting ( Male Nut/Sleeve )
  • Instructions
  • Can Be Used With Pilot Head Tip # 51-1036.
  • Vulcan
Write Your Own Review
You're reviewing:Vulcan Hart 417389-1 Flex Tube Kit 1/4" X 24" Stainless Steel
Your Rating
Customer Questions
What maintenance is required for the Vulcan Hart 417389-1 Stainless Steel Flex Tube Kit with Fittings?

Inspect the flex tube regularly for cracks, leaks, or corrosion at the fittings. Tighten connections to prevent gas or fluid leakage. Keep the surface clean and free from grease buildup. Proper maintenance ensures safe, efficient, and reliable operation.

What are common issues with the Vulcan Hart 417389-1 Stainless Steel Flex Tube Kit with Fittings?

  • Loose or leaking fittings under pressure.
  • Cracking or wear in flexible tubing over time.
  • Reduced flow due to internal blockage or kinks.
  • Corrosion at connection points causing performance loss.
  • Misalignment leading to improper sealing or connection stress.

We strive to provide our customers with a hassle-free and efficient shopping experience. Our shipping policy ensures the timely delivery of your orders and complete customer satisfaction. View More

We are committed to ensuring your complete satisfaction with every purchase. We understand that circumstances may arise where you must return a product or request a refund. If for any reason you are not satisfied, you may return the item(s) according to the terms outlined below. View More

This Payment Policy outlines the terms and conditions governing all payments made for products purchased through our website. By making a purchase, you agree to be bound by this Payment Policy. View More

Installation Steps

Step1: Turn off gas supply and ensure equipment is completely cool.

Step2: Remove the old flex tube and fittings using a wrench.

Step3: Attach compression nuts and ferrules to the new tube ends.

Step4: Connect the tube between gas supply and appliance fittings.

Step5: Tighten all connections securely without over-tightening.

Step6: Restore gas supply and check for leaks using a soap solution.

Step7: Ensure proper alignment to avoid kinks and maintain safe gas flow.
