

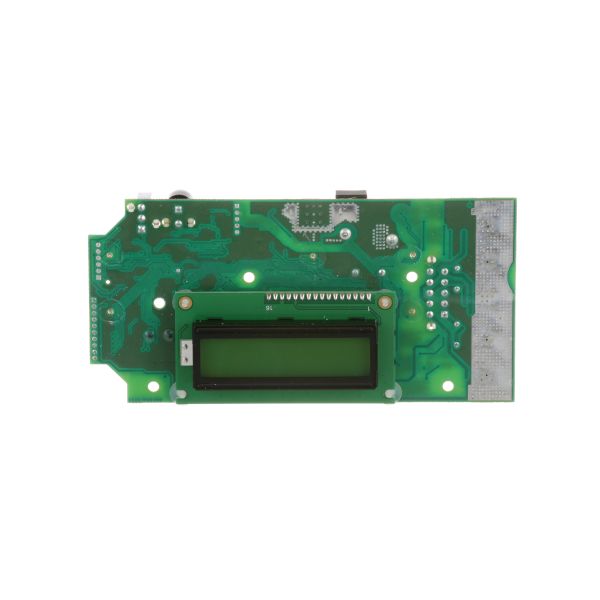
Bunn 42533.1001 Coffee Brewer Timer Board 6 3/8" X 3 1/8" Axiom

Special Price $389.89 Regular Price $536.95
In stock
SKU
42533.1001
Manufacturer:

The Bunn 42533.1001 Coffee Brewer Axiom Timer Board 6-3/8" X 3-1/8" is used to control the brew timing sequences, and process electrical signals to monitor water flow duration and heating cycles. It operates by using an electronic timing circuit to regulate the fermenting components to turn on, and off at proper times according to a set program. The board communicates with sensors and switches in the system to adjust the brewer cycle to ensure consistent operation. It fits in the control housing of compatible Axiom coffee brewers, attaches to the standoffs on the inside and is wired to the regulated panel and wiring loom.

Dimensions

  • Length: 9.5 In
  • Width: 5 In
  • Height: 4 In
  • Weight: 1.179 lbs
https://partsfe.com/media/catalog/product/b/u/bunn-42533-1001-axiom-timer-board-6-3-8-x-3-1-8-65585-2.jpg

Product Notes

  • Width: 6 3/8" | 162 mm
  • Height: 3 1/8" | 79 mm
Write Your Own Review
You're reviewing:Bunn 42533.1001 Coffee Brewer Timer Board 6 3/8" X 3 1/8" Axiom
Your Rating
Customer Questions
What maintenance is required for the Bunn 42533.1001 Timer Board?

Regularly inspect the timer board in the appliance for dust, moisture, or loose electrical connections that may affect performance. Keep the interior of the appliance clean and dry to prevent short circuits. Periodically check for stable timing cycles.

What are the common issues with the Bunn 42533.1001 Timer Board?

  • Inconsistent timing in the appliance.
  • Failure to initiate or complete brew cycles.
  • Electrical connection faults or corrosion.
  • Unresponsive control signals from the board.
  • Intermittent operation causes brewing interruptions.

We strive to provide our customers with a hassle-free and efficient shopping experience. Our shipping policy ensures the timely delivery of your orders and complete customer satisfaction. View More

We are committed to ensuring your complete satisfaction with every purchase. We understand that circumstances may arise where you must return a product or request a refund. If for any reason you are not satisfied, you may return the item(s) according to the terms outlined below. View More

This Payment Policy outlines the terms and conditions governing all payments made for products purchased through our website. By making a purchase, you agree to be bound by this Payment Policy. View More

Installation Steps

Step1: Disconnect power to the machine to prevent electrical shock.

Step2: Remove the access panel to locate the existing timer board.

Step3: Carefully disconnect wiring harnesses, noting positions.

Step4: Unscrew and remove the old board.

Step5: Install the new board and secure with screws.

Step6: Reconnect wires correctly.

Step7: Replace panel and restore power to test operationality.