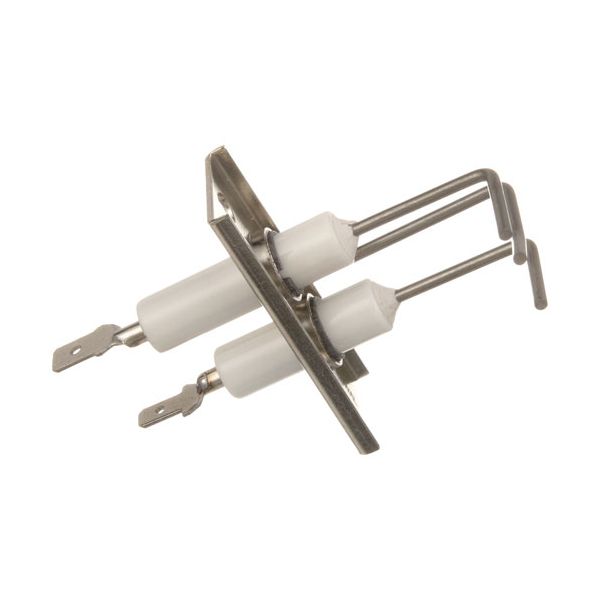
Dean 8073556ALT Fryer Ignitor/Sensor

Special Price $69.01 Regular Price $105.88
In stock
SKU
8073556ALT
Oven Parts, Ignitors,
Manufacturer:
The Dean 8073556ALT Fryer Ignitor/Sensor operates by producing a spark to the burner and, simultaneously detecting the presence of a flame during use. It provides the control system to ensure proper functioning. This is normally close to the burner assembly where flame sensing takes place. It is compatible with various models and is designed to initiate the heating process and control the continuity of flames. This is installed with the existing wiring and controls to assist in maintaining the consistent startup and operation during cooking cycles.

Dimensions

  • Length: 3.25 In
  • Width: 2 In
  • Height: 1 In
  • Weight: 0.25 lbs
https://partsfe.com/media/catalog/product/d/e/dean-8073556alt-fryer-ignitor-sensor_1.jpg

Product Notes

  • Ignitor/Sensor Fenwal #426
  • Fits Frymaster Models:
  • 1824/2424G, 1824G, 2424G, 24G, Scf, Scfc, Yscfc1824G,
  • Yscfc24/24/15, Yscfc2424G, Yscfc24G, Yscfc24G Series
Write Your Own Review
You're reviewing:Dean 8073556ALT Fryer Ignitor/Sensor
Your Rating
Customer Questions
What maintenance is required for the Dean 8073556ALT Ignitor/Sensor?

Regularly clean grease and carbon buildup from the ignitor and sensor area to ensure proper flame detection. Inspect wiring connections for looseness or corrosion and check alignment within the fryer assembly. Proper upkeep ensures accurate ignition and safe fryer operation. Avoid moisture exposure to prevent sensor malfunction.

What are common issues with the Dean 8073556ALT Ignitor/Sensor?

  • Ignition failure or delayed startup.
  • Flame sensor not detecting flame properly.
  • Grease buildup causing misfiring.
  • Intermittent heating or shutdown issues.
  • Sensor contamination leading to false readings.

We strive to provide our customers with a hassle-free and efficient shopping experience. Our shipping policy ensures the timely delivery of your orders and complete customer satisfaction. View More

We are committed to ensuring your complete satisfaction with every purchase. We understand that circumstances may arise where you must return a product or request a refund. If for any reason you are not satisfied, you may return the item(s) according to the terms outlined below. View More

This Payment Policy outlines the terms and conditions governing all payments made for products purchased through our website. By making a purchase, you agree to be bound by this Payment Policy. View More

Installation Steps

Step1: Disconnect power and gas supply, ensure fryer is cool.

Step2: Remove fryer panel and access the ignitor/sensor assembly area.

Step3: Disconnect wiring harness carefully noting and matching connections.

Step4: Remove the old ignitor/sensor from mounting bracket hardware.

Step5: Install new sensor in the same position, firmly aligned and securely.

Step6: Reconnect wiring harness firmly and securely.

Step7: Restore power/gas, test ignition cycle, and observe flame ignition for proper operation.