
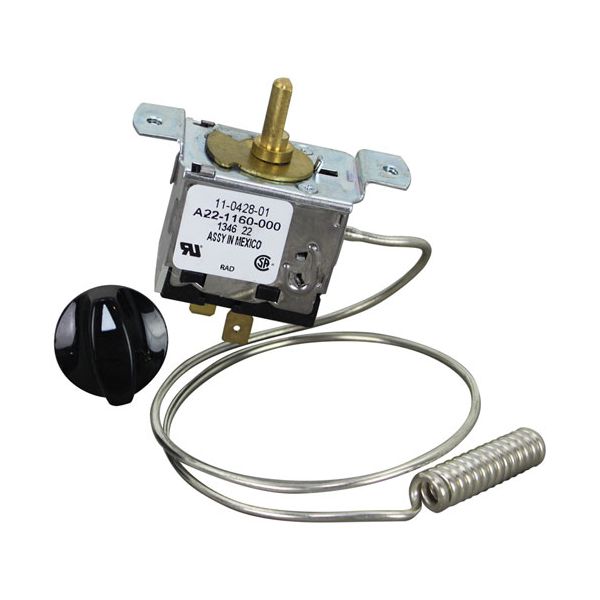
Ranco A22-1160 Ice Machine Thermostat Thermostat W/ Knob

Special Price $128.51 Regular Price $231.73
In stock
SKU
A22-1160
Manufacturer:

The Ranco A22-1160 Ice Machine Thermostat functions as a precise temperature controller which ensures both efficient ice production and operational efficiency. The part functions through temperature detection to manage the status of the refrigeration system. This Ice Machine Thermostat delivers three advantages which are improved energy efficiency alongside reduced component wear and steady ice production quality. The partworks perfectly in restaurants hotels and food service facilities to maintain dependable operation while stopping overheating or freezing problems that might affect ice output.

Dimensions

  • Length: 5 In
  • Width: 5 In
  • Height: 3 In
  • Weight: 0.308 lbs
https://partsfe.com/media/catalog/product/r/a/ranco-a22-1160-ice-machine-thermostat-thermostat-w-knob-87695-2.jpg

Product Notes

  • T'Stat W/Knob, Cube Size, Temp -19 To 22 Degrees F
  • Diferential 8 Degrees, Cap 20"
  • Scotsman
  • Ice Machine Cm250, Cm450(A,C,D,E), Cm500(C,D), Cm500R(C,D),
  • Cm550, Cm650(A,C,D,E,Re,We), Cm650C(A,D), Cm650Ra(C,D),
  • Cm855, Cm1000. Series: Cm500.
Write Your Own Review
You're reviewing:Ranco A22-1160 Ice Machine Thermostat Thermostat W/ Knob
Your Rating
Customer Questions
What maintenance is required for the Ranco A22-1160 Thermostat?

Inspect the ice machine capillary tube for kinks and ensure proper placement in the sensing area. Check knob operation and electrical connections regularly. Keep the control clean and dry to prevent corrosion. Always disconnect power before servicing to ensure better maintenance.

What are common issues with the Ranco A22-1160 Ice Machine Thermostat?

  • Inaccurate temperature control in ice production.
  • Ice Machine thermostat not cycling properly.
  • Damaged or kinked capillary tube.
  • Faulty internal contacts.
  • Knob not responding or slipping.
  • Inconsistent ice formation or harvesting.

We strive to provide our customers with a hassle-free and efficient shopping experience. Our shipping policy ensures the timely delivery of your orders and complete customer satisfaction. View More

We are committed to ensuring your complete satisfaction with every purchase. We understand that circumstances may arise where you must return a product or request a refund. If for any reason you are not satisfied, you may return the item(s) according to the terms outlined below. View More

This Payment Policy outlines the terms and conditions governing all payments made for products purchased through our website. By making a purchase, you agree to be bound by this Payment Policy. View More

Installation Steps

Step1: Disconnect power supply to the ice machine to prevent electric shock. Ensure system is cool.

Step2: Remove existing thermostat panel and note wiring connections carefully, label wires if needed.

Step3: Mount the thermostat in the same position securely, align mounting holes properly.

Step4: Reconnect wires to matching terminals as per diagram, tighten securely.

Step5: Attach knob and restore cover, ensure proper fit.

Step6: Restore power and test temperature control, observe operation for stability.