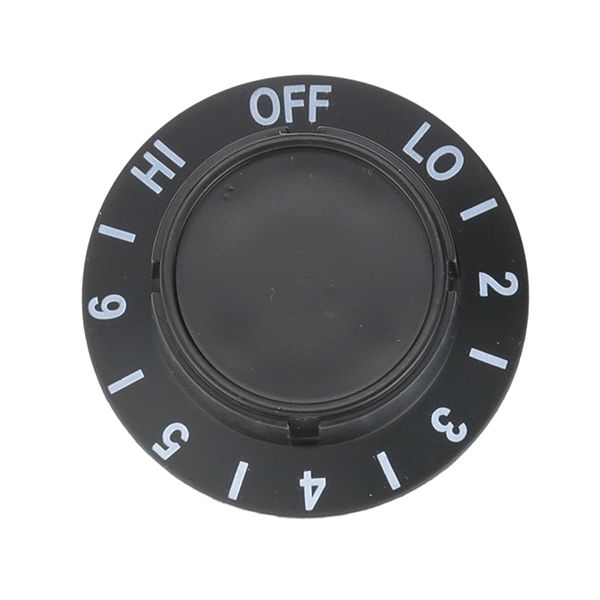
Delfield 3234557-S Infinite Control Knob 2" DIA Off-LO-1-6-HI
Special Price $21.84 Regular Price $39.00
In stock
SKU
3234557-S
Manufacturer:

The Delfield 3234557-S Dial 2 Infinite Switch Knob is a part that attaches to a control shaft to regulate the heat settings on compatible equipment with markings of OFF-LO-1-6-HI to select the correct one. It clamps on the 2" diameter shaft of the infinite switch such that the pointer is positioned on the scale of the control panel as it is turned. This knob is fixed on the front control panel of cooking or warming units, and it operates the switch stem. It is the user interface that allows the user to choose and show the desired level of heat during operation.
Dimensions
- Length: 2 In
- Width: 2 In
- Height: 1 In
- Weight: 0.028 lbs
Product Notes
- Infinite Switch Knob
- 2" Dia,(Off-Lo-1-6-Hi) ,("Delfield"), Flat Up, D Stem,
- For Inf Switch E816 # 421480 & E817 # 421481
- Delfield Model 48334, 48348, 48362, 48376, 549-Ch, 561-Ch,
- 573-Ch, F14Ew232, F14Ew348, F14Ew460, F14Ew572, F14Ew688,
- F14Ey232, F14Ey348, F14Ey460, F14Ey572, F14Ey688, F14Gw232,
- F14Gw348, F14Gw460, F14Gw572, F14Gw688, Kh2, Kh2-Nu, Kh3,
- Kh3-Nu, Kh4, Kh5, Kh5-Nu, Kh6, N8717-D, N8731-D, N8745-D,
- N8746N, N8759-D, N8768N, N8773-D, N8787-D