

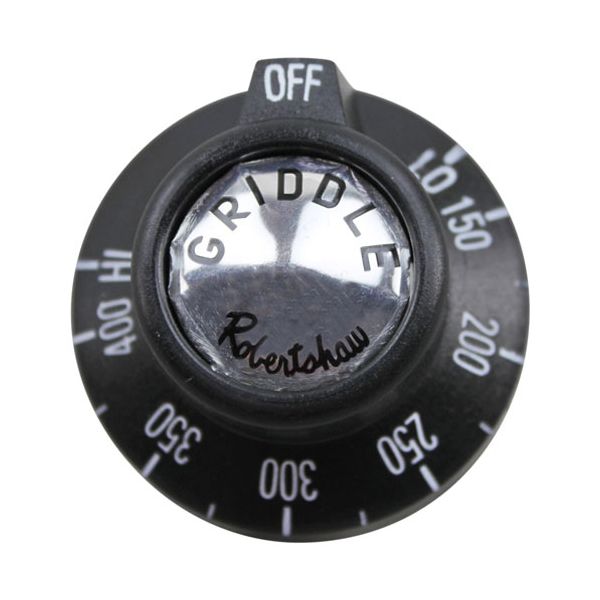
ROYAL RANGE 1517 Griddle Thermostat Knob 1-15/16" DIA HI/Low 11/16" L 150-400F BJ

$61.60
Out of stock
SKU
1517
Manufacturer:

The ROYAL RANGE 1517 Griddle Thermostat Knob 1-15/16" DIA HI/Low 11/16" L 150-400F BJ is a manual control interface component used to set the temperature of commercial cooking equipment by rotating a dial mechanism that is attached to the thermostat shaft. It works by converting the rotation of the knob to a change in the setting on the thermostat, and it can be set between OFF and LO and a calibrated range from 150°F to 400°F with the internal shaft correlating the knob setting to the control system. The notched indicator and protrusion provide the optimal position when adjusting the temperature control during operation.

Dimensions

  • Length: 1.75 In
  • Width: 2 In
  • Height: 2 In
  • Weight: 0.5 lbs
https://partsfe.com/media/catalog/product/r/o/royal-range-1517-bj-thermostat-knob-1-15-16-dia-off-lo-150-400f-hi-mount-11-16-dia-position-notch-up-11-16-long-protrusion-16459-2.jpg

Product Notes

  • Bj T'Stat Knob, Black
  • [ 1-15/16" Dia ] [ Off-Lo-150-400-Hi] [Mount 11/16" Dia.]
  • [Position Notch Up ]
  • 11/16" Long Protrusion On Back Of Knob.
  • Cecilware Griddle Ag 24, 36, 48, All Before 1/86
  • Garland Griddle G24
  • Imperial Grill Imga, Ir
  • Jade Grill Jggt, Jgt
  • Montague G15, G26
  • Tri-Star Tstg
  • Wolf Grill Hi-Boy & Mtg & Pro W/Suffix Tg~
  • Stg.
  • Range W/Grill: Ch, Chss, F, Fs.
Write Your Own Review
You're reviewing:ROYAL RANGE 1517 Griddle Thermostat Knob 1-15/16" DIA HI/Low 11/16" L 150-400F BJ
Your Rating
Customer Questions
What maintenance is required for the ROYAL RANGE 1517 Thermostat Knob?

Keep the thermostat knob clean and free from grease buildup to ensure smooth rotation. Regularly check mounting tightness and alignment to prevent slippage or inaccurate settings. Inspect for wear on the notch during routine equipment servicing.

What are common issues with the ROYAL RANGE 1517 Thermostat Knob?

  • Stiff or hard knob rotation due to internal wear or debris.
  • Inaccurate temperature control caused by worn calibration.
  • Loose mounting leading to wobble during adjustment.
  • Faded markings making settings difficult to read.
  • Notch or wear affecting proper positioning.

We strive to provide our customers with a hassle-free and efficient shopping experience. Our shipping policy ensures the timely delivery of your orders and complete customer satisfaction. View More

We are committed to ensuring your complete satisfaction with every purchase. We understand that circumstances may arise where you must return a product or request a refund. If for any reason you are not satisfied, you may return the item(s) according to the terms outlined below. View More

This Payment Policy outlines the terms and conditions governing all payments made for products purchased through our website. By making a purchase, you agree to be bound by this Payment Policy. View More

Installation Steps

Step1: Turn off and unplug the appliance to prevent electrical hazards.

Step2: Remove the old knob by pulling it straight off the shaft.

Step3: Align the new knob mounting hole with the thermostat shaft.

Step4: Ensure the notch is positioned correctly.

Step5: Push the knob firmly into place until secure.

Step6: Test rotation for proper operation.