Jade Range 2035100000 Oven Door Micro Switch W/ 2 Hole 1" Centers

Special Price $141.95 Regular Price $267.33
In stock
SKU
2035100000
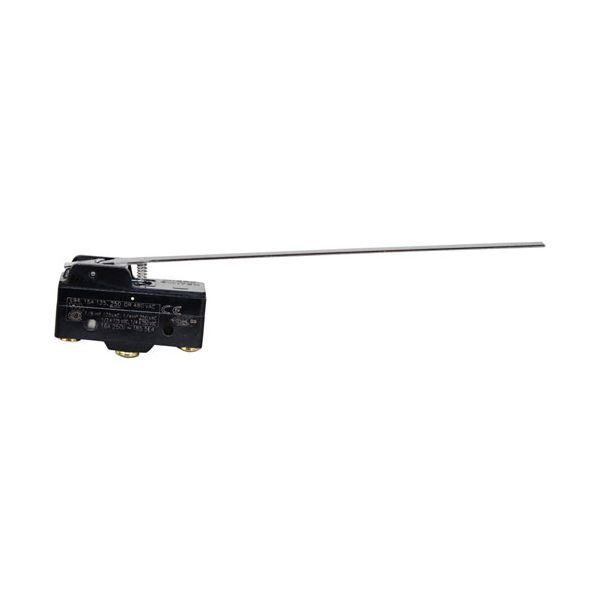
The Jade Range 2035100000 Door Micro Switch is a essential component that makes the oven door to function properly. It has 2 holes which are 1 inch apart and has both Normally Open and Normally Closed terminals to switch electrical circuits. It is rated for 15A at 125, 250, or 480 VAC, making it perfect for high powered ovens. It comes with a spring under lever and a 5-inch lever for the easy pull and screw terminals for the connection. Suitable for Jade oven models JSLB, JSR, and JTRH, it improves safety, reliability and performance.

Dimensions

  • Length: 6.5 In
  • Width: 1.25 In
  • Height: 0.75 In
  • Weight: 0.09 lbs
https://partsfe.com/media/catalog/product/j/a/jade-range-2035100000-oven-door-micro-switch-w-2-hole-1-centers-84051-2.jpg

Product Notes

  • Door Micro Switch, 2 Hole, 1" Ctrs ] [ No, Nc ]
  • 15A 125, 250 Or 480 Vac, Spring Under Lever,
  • 5" Lever, Screw Terminals,
  • Jade Oven Jslb, Jsr, Jtrh
Write Your Own Review
You're reviewing:Jade Range 2035100000 Oven Door Micro Switch W/ 2 Hole 1" Centers
Your Rating
Customer Questions
What maintenance is required for the Jade Range 2035100000 Door Micro Switch?

Regularly inspect and clean the oven micro switch to prevent grease buildup and debris affecting contact. Ensure mounting screws are tight and wiring is secure. Proper maintenance ensures reliable oven door detection and safe operation, reducing electrical hazards and misfiring risks.

What are common issues with the Jade Range 2035100000 Door Micro Switch?

  • Switch failure causing oven not to recognize door closed.
  • Intermittent contact leading to heating interruptions.
  • Misalignment of actuator affecting response accuracy.
  • Electrical wear or corrosion causing inconsistent operation.
  • Loose wiring connections causing sporadic switch behavior.

We strive to provide our customers with a hassle-free and efficient shopping experience. Our shipping policy ensures the timely delivery of your orders and complete customer satisfaction. View More

We are committed to ensuring your complete satisfaction with every purchase. We understand that circumstances may arise where you must return a product or request a refund. If for any reason you are not satisfied, you may return the item(s) according to the terms outlined below. View More

This Payment Policy outlines the terms and conditions governing all payments made for products purchased through our website. By making a purchase, you agree to be bound by this Payment Policy. View More

Installation Steps

Step1: Disconnect oven power supply at breaker to prevent electric shock.

Step2: Open access panel and remove mounting screws of old switch.

Step3: Note wiring positions and disconnect leads carefully.

Step4: Install new switch aligning centers and secure screws.

Step5: Reattach wires firmly to matching terminals.

Step6: Restore power and test door activation,ensure proper safety interlock operation.