

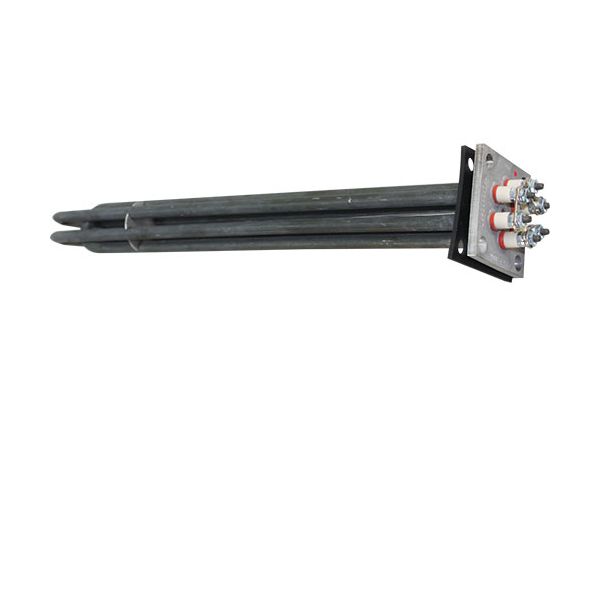
Jackson 4540-121-47-39 Dishmachine Heating Element 5450W 240V

Special Price $280.79 Regular Price $443.95
In stock
SKU
4540-121-47-39
Manufacturer:

The Jackson 4540-121-47-39 Dishmachine Heating Element 240V 5450W is an insulated furnace assembly that converts electrical energy into heat through an internal resistance substance. Once powered, thermal output spreads into the wash tank to raise water temperature during cleaning cycles. Installed within a commercial dishwashing unit, it mounts inside the lower tank section and connects to the electrical supply through designated terminals. As part of the wash system, it supports temperature levels required for soil removal during repeated dish processing, ensuring stable heat delivery across changing load conditions in kitchen operations.

Dimensions

  • Length: 19 In
  • Width: 3 In
  • Height: 3 In
  • Weight: 3.17 lbs
https://partsfe.com/media/catalog/product/j/a/jackson-4540-121-47-39-heating-element-240v-5450w-32776-2.jpg

Product Notes

  • 3 Phase, With Gasket, 17-5/8" Long From Top Of Flange,
  • Flange = 3" Square
  • With Thermowell
  • Jackson Tempstar (Hh, Lt, Nb, S, Sds)
JACKSON:
Write Your Own Review
You're reviewing:Jackson 4540-121-47-39 Dishmachine Heating Element 5450W 240V
Your Rating
Customer Questions
What maintenance is required for the Jackson 4540-121-47-39 Heating Element?

Regularly inspect the heating element for scale buildup, corrosion, or damage to ensure efficient heat transfer. Clean it periodically using appropriate descaling solutions. Check electrical connections for tightness and wear. Always disconnect power before servicing to prevent electrical hazards and ensure safe handling.

What are common issues with the Jackson 4540-121-47-39 Heating Element?

  • Element not heating or inconsistent temperature output.
  • Burnout due to electrical surges or prolonged use.
  • Scale buildup reducing heating efficiency.
  • Tripping breakers or causing power interruptions.
  • Loose or damaged wiring connections.

We strive to provide our customers with a hassle-free and efficient shopping experience. Our shipping policy ensures the timely delivery of your orders and complete customer satisfaction. View More

We are committed to ensuring your complete satisfaction with every purchase. We understand that circumstances may arise where you must return a product or request a refund. If for any reason you are not satisfied, you may return the item(s) according to the terms outlined below. View More

This Payment Policy outlines the terms and conditions governing all payments made for products purchased through our website. By making a purchase, you agree to be bound by this Payment Policy. View More

Installation Steps

Step1: Disconnect power and water supply to prevent electric shock, and apply lockout/tagout if available.

Step2: Remove access panel and locate old heating element connections inside the appliance housing.

Step3: Disconnect wiring terminals carefully, noting placement and labeling each wire for correct reassembly.

Step4: Install new heating element, secure mounting hardware tightly, ensuring proper alignment and seal.

Step5: Reconnect wiring, replace panel, restore power, then test heating function for safe operation.