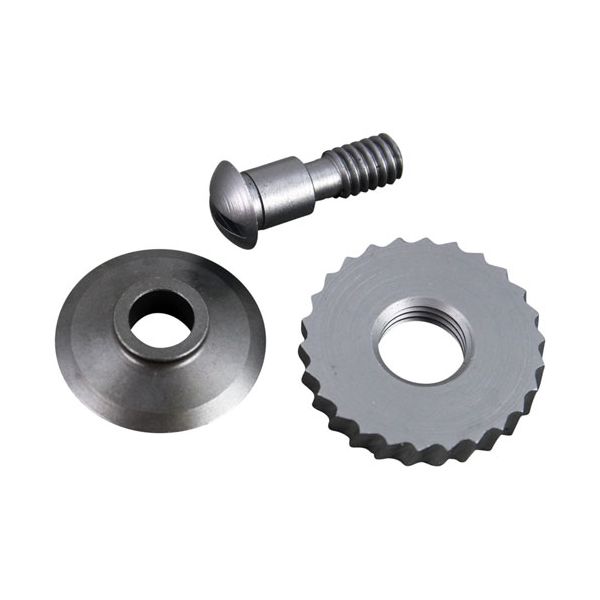
Edlund G006 Parts Kit W/Gear Knife & Stud 203/266

Special Price $67.18 Regular Price $81.33
In stock
SKU
G006
The Edlund G006 Parts Kit with Gear Knife & Stud 203/266 is a replacement kit for compatible systems. The kit contains all the necessary operating parts including the gear, knife, and stud for the can opening procedure and is a key component of the restoration of cutting performance. These are fitted into the can opener assembly and operate in conjunction with each other to cut the lids and ensure smooth mechanical operation in repetitive use. It is used in commercial kitchens and food preparation areas, and is installed during maintenance when the original components damageout or become damaged.

Dimensions

  • Length: 6.5 In
  • Width: 1 In
  • Height: 0.5 In
  • Weight: 0.024 lbs
https://partsfe.com/media/catalog/product/e/d/edlund-g006-parts-kit-w-gear-knife-stud-203-266-94811-2.jpg

Product Notes

  • Includes (1) Gear, (1) Knife, And (1) Stud
  • Edlund Model 203 266
EDLUND:
EDLG006, EDLK006, EDLKT2326, G006, G006M, G006SP, K006, K006M, K006SP, KT2326, KT2326 (6)
Write Your Own Review
You're reviewing:Edlund G006 Parts Kit W/Gear Knife & Stud 203/266
Your Rating
Customer Questions
What maintenance is required for the Edlund G006 Parts kit?

Clean all components after each use to prevent food residue buildup and corrosion. Lubricate moving gears periodically to ensure smooth operation. Inspect the knife for sharpness and replace if dull. Check studs and fittings regularly for tightness and wear to maintain safe, efficient performance.

What are common issues with the Edlund G006 Parts kit?

  • Worn drive gear causing slipping or failure to rotate cans.
  • Dull knife leading to incomplete lid cutting or jagged edges.
  • Bent or damaged stud affecting alignment and movement.

We strive to provide our customers with a hassle-free and efficient shopping experience. Our shipping policy ensures the timely delivery of your orders and complete customer satisfaction. View More

We are committed to ensuring your complete satisfaction with every purchase. We understand that circumstances may arise where you must return a product or request a refund. If for any reason you are not satisfied, you may return the item(s) according to the terms outlined below. View More

This Payment Policy outlines the terms and conditions governing all payments made for products purchased through our website. By making a purchase, you agree to be bound by this Payment Policy. View More

Installation Steps

Step1: Disconnect power and ensure equipment is cool before disassembly and unplug machine

Step2: Remove housing and worn components using correct tools, keep screws organized and label parts

Step3: Install new gear, knife, and stud aligning with manufacturer orientation marks as required

Step4: Tighten fasteners securely, avoid over-tightening to prevent damage or misalignment, recheck alignment

Step5: Reassemble unit, restore power, and test operation while keeping hands clear ensure safe operation