
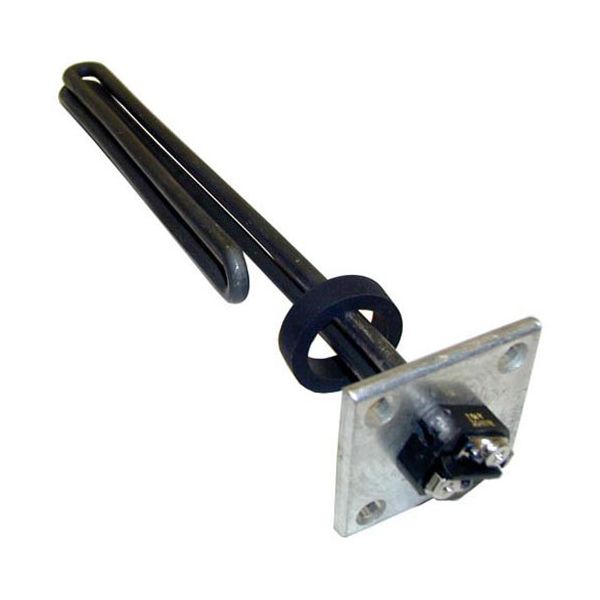
Cecilware G197A Heating Element W/Flange 240V 3500W 12"

Special Price $49.46 Regular Price $78.51
In stock
SKU
G197A
Manufacturer:

The Cecilware G197A Heating Element with Flange is used in the food service equipment such as coffee urns, hot water dispensers and other heating appliances. It has a power of 240V, 3500W, length of 12 inches, bolt-hole centers of 1.75 inches and a flange of 2 1/2” square for easy fixing. This heating element is for models with screw type terminals and comes with a round gasket #32-1252 for sealing. It is used to heat liquids and performs its function well in the harshest conditions that are typical for the kitchen. Perfect for organizations that need constant heating without the need to turn off the system.

Dimensions

  • Length: 13 In
  • Width: 2.5 In
  • Height: 2.5 In
  • Weight: 1.12 lbs
https://partsfe.com/media/catalog/product/c/e/cecilware-g197a-heating-element-w-flange-240v-3500w-12-75536-2.jpg

Product Notes

  • Element, [ 240V 3500W 1-Ph ] [ 1.75" Bolt Hole Ctrs,
  • 2 1/2" Square Flange, 12" Long Inside ]
  • [Terminals {Screw }, [ Includes Round Gasket # 32-1252 ]
  • Cecilware
CECILWARE:
GRINDMASTER:
Write Your Own Review
You're reviewing:Cecilware G197A Heating Element W/Flange 240V 3500W 12"
Your Rating
Customer Questions
What maintenance is required for the Cecilware G197A Heating Element W/Flange?

Regularly inspect electrical connections and tighten any loose terminals to ensure safe operation. Remove mineral scale buildup on the heating surface to maintain efficient heat transfer. Check flange seals for leaks and replace if worn. Always disconnect power before servicing.

What are common issues with the Cecilware G197A Heating Element W/Flange?

  • Mineral scaling reduces heating efficiency and uneven heating.
  • Loose or burnt electrical connections cause intermittent power loss.
  • Flange gasket leaks lead to water seepage.
  • Element burnout from voltage surges or dry operation.

We strive to provide our customers with a hassle-free and efficient shopping experience. Our shipping policy ensures the timely delivery of your orders and complete customer satisfaction. View More

We are committed to ensuring your complete satisfaction with every purchase. We understand that circumstances may arise where you must return a product or request a refund. If for any reason you are not satisfied, you may return the item(s) according to the terms outlined below. View More

This Payment Policy outlines the terms and conditions governing all payments made for products purchased through our website. By making a purchase, you agree to be bound by this Payment Policy. View More

Installation Steps

Step1: Disconnect power supply and lockout; ensure breaker is off and drain tank completely.

Step2: Remove old heating element by loosening flange bolts carefully to avoid damage.

Step3: Clean mounting surface and inspect gasket area for corrosion or debris.

Step4: Position new element with gasket, align flange and secure bolts evenly in cross pattern.

Step5: Refill tank, restore power, check for leaks and proper heating operation.