

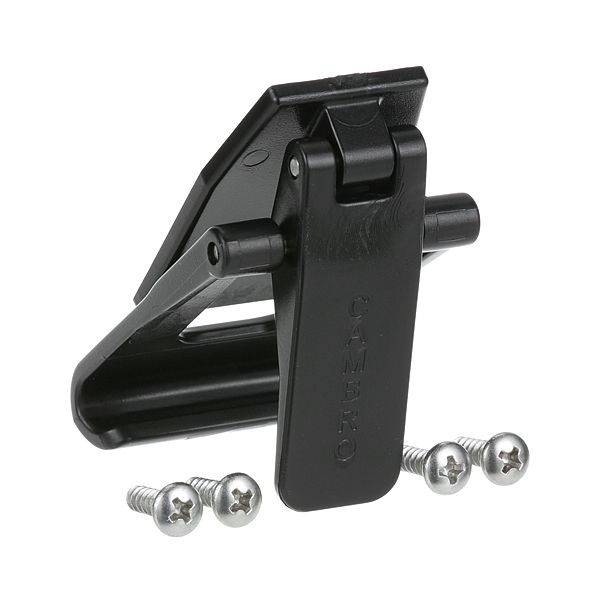
Cambro H05021 Plastic Latch Kit W/4 Screws

$7.58
In stock
SKU
H05021
Manufacturer:

The Cambro H05021 Plastic Latch Kit W/4 Screws is used to provide controlled sealing pressure on the components to ensure that they are held in place during handling or operation. It has a design that enables the passage of fasteners through it and still maintains the carrier in position. This is made of plastic and is intended to fit the contours of particular carriers and maintain the spacing consistent. It is a component that is frequently involved in foodservice equipment assemblies.

Dimensions

  • Length: 3.25 In
  • Width: 0.75 In
  • Height: 0.75 In
  • Weight: 0.25 lbs
https://partsfe.com/media/catalog/product/c/a/cambro-h05021-4-hole-plstc-clamp-cam-53937.jpg

Product Notes

  • 4 Hole Plastic Clamp Cam,
  • 1.6 Small / Medium Door Latch Kit
  • Cambro 100Mpc, 100Mpchl (Units After 5/1/06) 1826Mtc
  • 1826Ltc, 1826Ltc3 300Mpc, 1318Mtc Cmb, Cmbl (Units After
  • 1/06) Cvc72, Cvc724
Write Your Own Review
You're reviewing:Cambro H05021 Plastic Latch Kit W/4 Screws
Your Rating
Customer Questions
What maintenance is required for the Cambro H05021 Clamp Cam?

Check for cracks or wear that could affect clamping performance. Keep the cam clean of debris and ensure smooth rotation. Tighten or adjust mounting if necessary for accurate operation.

What are the common issues with the Cambro H05021 Clamp Cam?

  • Cracking or breaking under pressure.
  • Loose or slipping clamping action.
  • Difficulty rotating or locking.
  • Misalignment affecting secure closure.
  • Plastic deformation over time.

We strive to provide our customers with a hassle-free and efficient shopping experience. Our shipping policy ensures the timely delivery of your orders and complete customer satisfaction. View More

We are committed to ensuring your complete satisfaction with every purchase. We understand that circumstances may arise where you must return a product or request a refund. If for any reason you are not satisfied, you may return the item(s) according to the terms outlined below. View More

This Payment Policy outlines the terms and conditions governing all payments made for products purchased through our website. By making a purchase, you agree to be bound by this Payment Policy. View More

Installation Steps

Step1: Open the appliance and ensure it is clean and stable before starting.

Step2: Remove the damaged clamp cam by unscrewing the four mounting screws.

Step3: Align the new clamp cam with the existing holes on the latch area.

Step4: Secure it using the provided screws, tightening evenly.

Step5: Test the latch to ensure proper connection and door sealing.

Step6: Avoid overtightening to prevent plastic damage.