
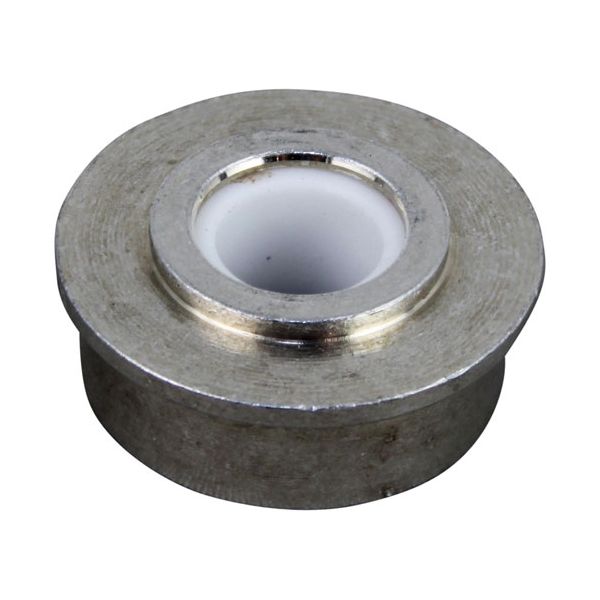
Hatco HT05-02-011-00 Bearing Hub Assembly

Special Price $19.87 Regular Price $33.00
In stock
SKU
HT05-02-011-00
Manufacturer:

The Hatco HT05-02-011-00 Bearing Hub Assembly is used as an exact fit mounting and support point of rotating components within Hatco warming systems. It fixes the bearing interface to ensure alignment allowing controlled movement and mechanical wear minimization between connected parts. This assembly is a part of the internal drive structure of the unit, and it helps in stable rotation to ensure that the equipment works properly. In actual commercial kitchen scenarios, it assists in the continuity of operation by making the moving components operate without problems.

Dimensions

  • Length: 7 In
  • Width: 4 In
  • Height: 0.5 In
  • Weight: 0.1 lbs
https://partsfe.com/media/catalog/product/h/a/hatco-ht05-02-011-00-lower-bearing-1-hole-and-has-a-3-8-teflon-hole-in-the-center-73676.jpg

Product Notes

  • Lower Bearing, New Style, Fits 1" Hole, 3/8" Teflon Hole In
  • Center, Has Shoulder, Aluminum Bearing
  • Hatco Tk, Trh
Write Your Own Review
You're reviewing:Hatco HT05-02-011-00 Bearing Hub Assembly
Your Rating
Customer Questions
What maintenance is required for the Hatco HT05-02-011-00 Lower Bearing?

Regularly inspect the lower bearing in the appliance for wear, noise, or reduced movement. Keep the area clean and free from debris that may affect rotation. Apply appropriate lubrication if required for smooth operation. Always power off the appliance before performing maintenance.

What are the common issues with the Hatco HT05-02-011-00 Lower Bearing?

  • Grinding or unusual noise during appliance operation.
  • Restricted or rough movement affecting performance.
  • Bearing wear leading to instability in the appliance.
  • Overheating caused by excessive friction.

We strive to provide our customers with a hassle-free and efficient shopping experience. Our shipping policy ensures the timely delivery of your orders and complete customer satisfaction. View More

We are committed to ensuring your complete satisfaction with every purchase. We understand that circumstances may arise where you must return a product or request a refund. If for any reason you are not satisfied, you may return the item(s) according to the terms outlined below. View More

This Payment Policy outlines the terms and conditions governing all payments made for products purchased through our website. By making a purchase, you agree to be bound by this Payment Policy. View More

Installation Steps

Step1: Disconnect power supply completely and ensure equipment is cool before starting remove access panel carefully.

Step2: Remove worn bearing and clean housing thoroughly, checking for debris or damage.

Step3: Align new bearing and press-fit into mounting hole using steady pressure.

Step4: Insert shaft through center and verify smooth rotation without binding.

Step5: Reassemble components and test operation under load to confirm proper alignment and operation.