
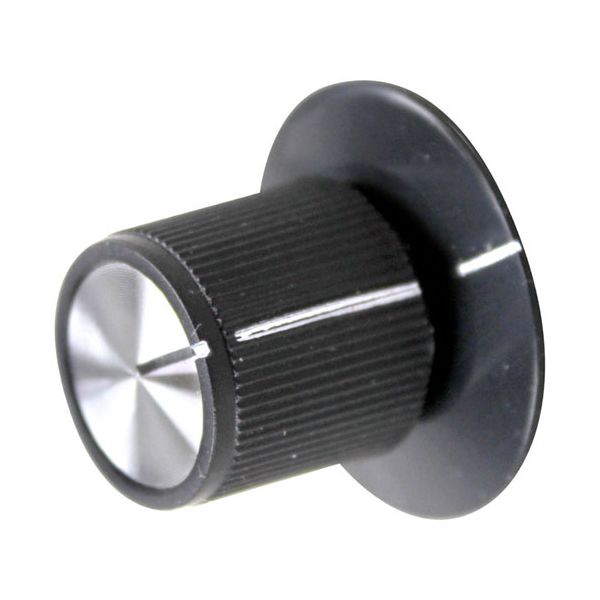
Hatco HT5-30-043 Black Pointer Knob W/white Indicator 1-1/8" DIA

Special Price $6.54 Regular Price $8.00
In stock
SKU
HT5-30-043
Manufacturer:

The Hatco HT5-30-043 Black Pointer Knob with white indicator is used to adjust the settings of connected equipment by attaching it to a control shaft and rotating it. The flat right-side design is in line with the shaft profile to pass the turning motion and the indicator displays the position chosen. The knob is 1-1/8" in diameter and has a flat hole to ensure a better fit. Its black surface and contrasting indicator assist in making visual when operating and adjusting it.

Dimensions

  • Length: 1.2 In
  • Width: 1.2 In
  • Height: 0.75 In
  • Weight: 0.1 lbs
https://partsfe.com/media/catalog/product/h/a/hatco-ht5-30-043-black-pointer-knob-w-white-indicator-1-1-8-dia-187-flat-right-99892.jpg

Product Notes

  • Pointer Knob, Black W/ White Indicator
  • [ 1-1/8" Dia ] [ Pointer] [.187 Flat Right ]
  • [ Round ],
  • Hatco Gr, Gr-B, Gr2Bw-24, Gr2Bw-30, Gr2Bw-36, Gr2Bw-42,
  • Gr2Bw-48, Gr2Bw-54, Gr2Bw-60, Gr2Bw-66, Gr2Bw-72, Gra,
  • Gra-36D3, Grah, Grah-42, Grah-60, Grah-60-D3, Grah-60D3,
  • Grahl, Gral, Gral-24D3, Gral-36D3, Gral-72D3, Grcd-1P,
  • Grcd-1Pd, Grcd-2P, Grcd-2Pd, Grcd-3P, Grcd-3Pd, Grcdh-1P,
  • Grcdh-1Pd, Grcdh-2P, Grcdh-2Pd, Grcdh-3P, Grcdh-3Pd,
  • Grcmw-1Dh, Grcsl-24, Grcslh-24, Grh, Grhd-2P, Grhd-2Pd,
  • Grhd-3P, Grhd-3Pd, Grhd-4P, Grhd-4Pd, Grhdh-2P, Grhdh-2Pd,
  • Grhdh-3P, Grhdh-3Pd, Grhdh-4P, Grhdh-4Pd
Write Your Own Review
You're reviewing:Hatco HT5-30-043 Black Pointer Knob W/white Indicator 1-1/8" DIA
Your Rating
Customer Questions
What maintenance is required for the Hatco HT5-30-043 Pointer Knob?

Regularly check the pointer knob on the appliance for secure attachment and proper alignment. Clean it to remove grease or debris that may affect grip or accuracy. Inspect for cracks or wear that could impact control. Ensure the appliance is powered off before handling.

What are the common issues with the Hatco HT5-30-043 Pointer Knob?

  • Loose fit causing inaccurate control on the appliance.
  • Cracked or worn knob affecting usability.
  • Slipping during adjustment on the appliance.
  • Misalignment leading to incorrect setting indication.

We strive to provide our customers with a hassle-free and efficient shopping experience. Our shipping policy ensures the timely delivery of your orders and complete customer satisfaction. View More

We are committed to ensuring your complete satisfaction with every purchase. We understand that circumstances may arise where you must return a product or request a refund. If for any reason you are not satisfied, you may return the item(s) according to the terms outlined below. View More

This Payment Policy outlines the terms and conditions governing all payments made for products purchased through our website. By making a purchase, you agree to be bound by this Payment Policy. View More

Installation Steps

Step1: Disconnect electrical power at main switch before starting.

Step2: Remove front control panel access screws and cover carefully.

Step3: Align knob flat with shaft and indicator in correct orientation.

Step4: Push knob firmly onto shaft until fully seated and secure.

Step5: Tighten set screw if present to lock knob in place.

Step6: Verify smooth rotation and indicator alignment across full control.

Step7: Restore power and test control operation for proper response operation.